Home »
Articles
How to Integrate WordPress with Salesforce (Easy Method)?
Learn how to integrate WordPress with Salesforce (Easy Method)?
Submitted by Anusha Vunnam, on MAR 03, 2022
This article is exclusively intended for Salesforce users. In this post, we are going to explain integrating WordPress with Salesforce with simple steps.Meanwhile, if you are new to Salesforce or would like to make your career as a Salesforce professional then you need to accredit the certification on this Salesforce Vlocity Training. The simplest approach is to connect your site with Salesforce.

Does Salesforce have a WordPress integration?
Absolutely. When your forms are accepted, Salesforce may be integrated with WordPress to create objects automatically.
We'll guide you on how to use the addon of WPForms Salesforce to integrate Salesforce and WordPress in this step-by-step guide.
The addon of WPForms Salesforce is the most effective way to connect WordPress with Salesforce. You won't need to hire a developer to use it because we'll exhibit to you how to configure the connection quickly on your own.
Let us now begin with the creating steps for integrating WordPress with Salesforce.
Step 1: Verify the Salesforce Version
Let's make sure API access is available through your Salesforce account before we begin. Verifying this now would assist you to avoid problems later.
The following Salesforce plans have API access:
- Unlimited Edition
- Performance Edition
- Enterprise Edition
- Developer Edition
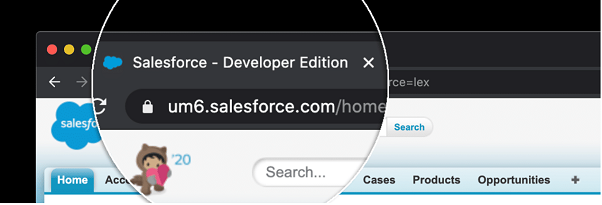
Sign in to Salesforce right now to check your Salesforce edition. In your browser tab's title section, your edition would appear as follows:
There is another technique to check if you can't find the edition.
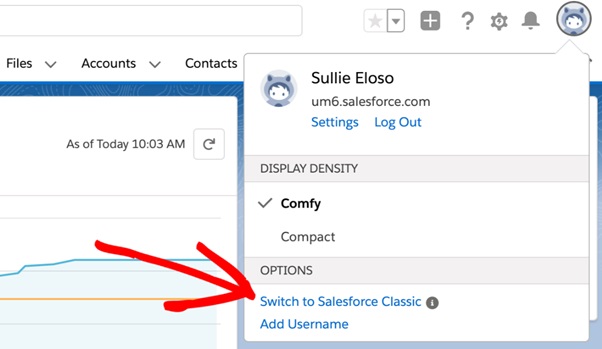
If you're using Lightning Experience, first click the profile icon, then "Switch to Salesforce Classic".

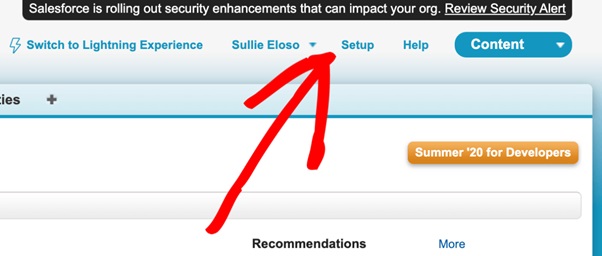
Then, at the page’s top, click Setup.

Extend Company Profile, and then select Company Information.
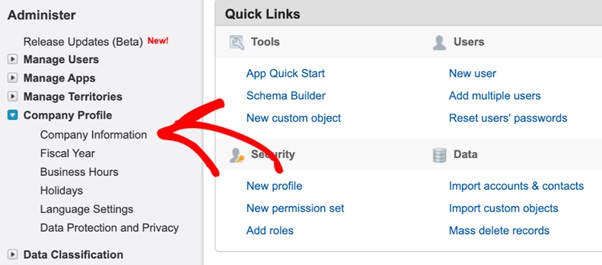
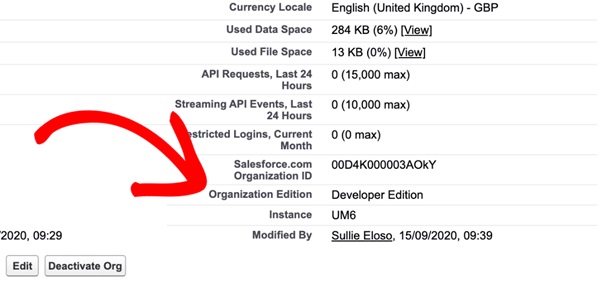
On the right, near the page’s bottom, you'll see your Salesforce edition listed.
If you're not utilizing anyone from these editions we discussed before, this is the right time to contact Salesforce and request a change.
We can go to the next stage when you are already on an edition with API accessibility. The site of Salesforce must be kept open in a separate tab so you can quickly return to it.
Step 2: Installation of WPForms Plugin
Currently, we can configure our Salesforce connection by installing and activating the WPForms plugin.
By installing and activating the WPForms plugin, we could now set up our Salesforce connection.
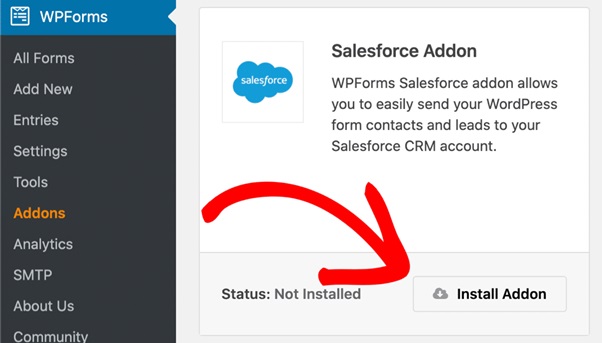
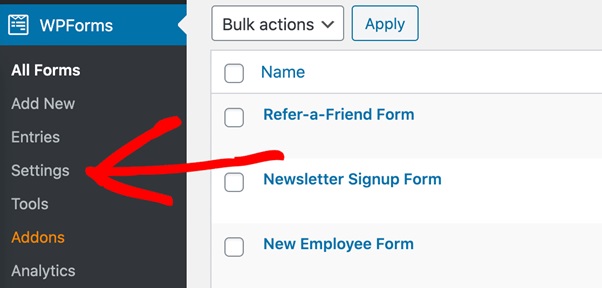
The Salesforce extension for WPForms must then be installed and activated. Select WPForms -> Addons in the sidebar of WordPress dashboard.
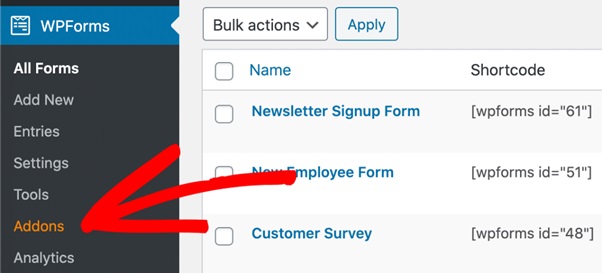
After that, click this button for installing Salesforce addon:
Now! Everything is all set.
Let's get WPForms connected to Salesforce right now. Keep your WordPress tab open so that we may quickly revert to WPForms in the further step.
Step 3. Integrate Salesforce with WordPress
We'll create a Salesforce application here. We require an app for WPForms to connect to our site.
If you haven't previously done so, sign in to the Salesforce account. When you haven't already, you must switch to the layout of Salesforce Classic.
If the Classic screen appears, go to the navigation bar at the top and click Setup.
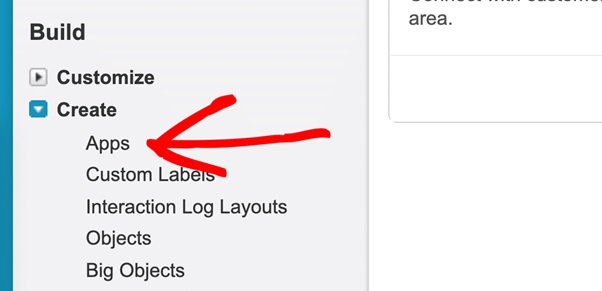
Then, on the left-hand side, scroll downwards and seek the item in the Build menu. For expanding the list, select Create, and click the link Apps beneath it.
Now we'll go to the page's Connected Apps section and scroll down. Click the button New to begin.

On the screen of the New Connected App, we're all set to create our app. First, fill in the following two fields:
- Type name for the application in the Connected App Name Type anything which makes sense. When you're finished, your name is copied by Salesforce into the API Name area for you.
- Fill in the email address in the Contact Email.
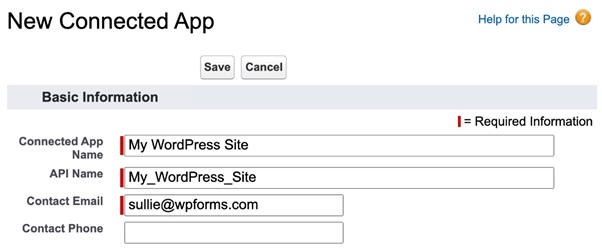
That's it for now; remain on this screen for further steps.
Step 4. Configure Permissions for Your Salesforce Application
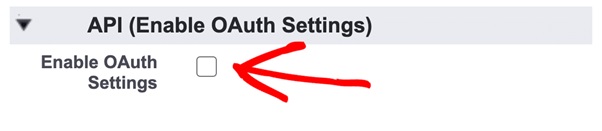
For the newly created app, we must now set up authentication.
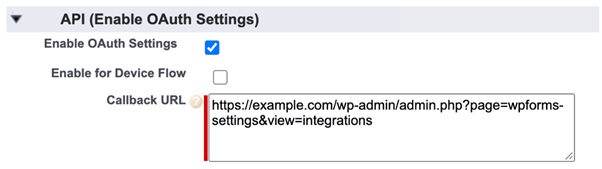
Go ahead and check the checkbox Enable OAuth Settings in the API section.
We'll be required to hold the Callback URL for WPForms so that we could paste it into Salesforce.
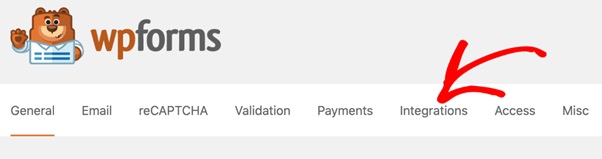
Return to the WordPress site in a distinct tab and navigate to WPForms -> Settings.
Go to the top tabs and then click Integrations.
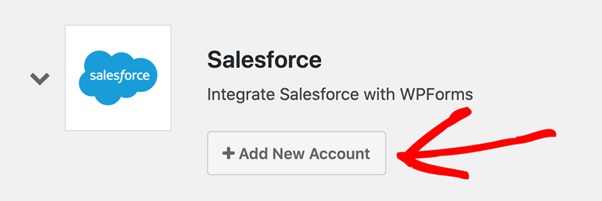
The Salesforce icon can be found by scrolling down the page of Integrations. Expand the box in this line by clicking the little arrow left to the logo. You can now select the button Add New Account.
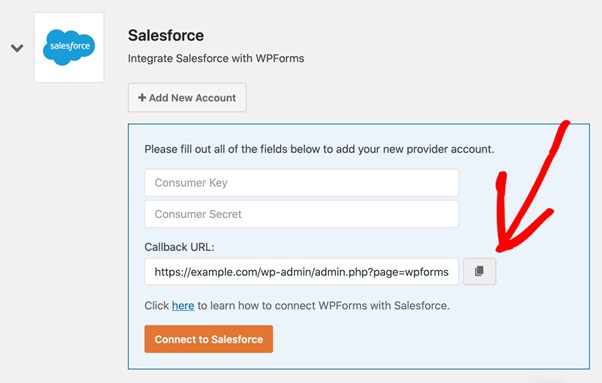
The callback URL can be found here. To save it to for clipboard, click the copy symbol here.
Return to the Salesforce tab at this time. Paste the URL of Callback into the settings box of OAuth as follows:
Excellent. We're almost done with this section. Scroll down to "Selected OAuth Scopes" and search for the following two items:

Add the two permissions to the box "Selected OAuth Scopes" using the right-hand arrows.
Here's a short video that explains how it works:
Everything is set? Excellent. Now, at the screen's bottom, click Save.
Salesforce would provide notification to affirm that your application is mounted in the background.
Before proceeding to Step 4, we suggest you wait for at least ten minutes. If you attempt to go ahead, you'll get the following error:

Don't be concerned! This issue simply signifies that your Salesforce connection hasn't been configured. It's advisable to give it another few minutes before attempting again.
Step 5. Connecting WordPress to the Salesforce
Excellent! The API keys can be copied into WordPress now that we've waited for 10 minutes.
You'll want to keep WPForms and Salesforce in various tabs, just as before.
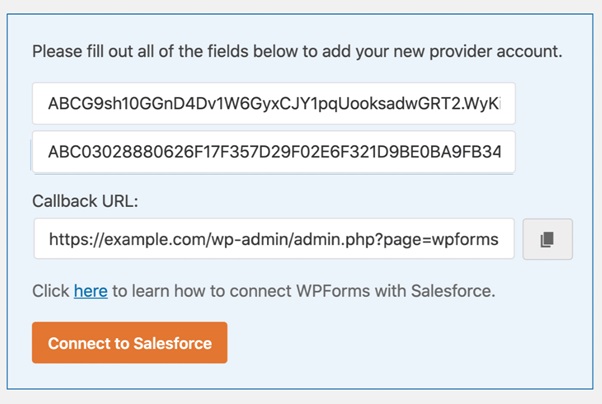
Implement these two steps for copying the keys:
- Click the Copy button which is next to the Consumer Key in your Salesforce browser tab. Copy the key and paste it into the WPForms tab.
- Return to Salesforce and see towards the right, press the "Click to reveal" which is Next to the Secret Key. Revert to WPForms and then paste the key there as well.
Everything has been completed. Now you could click "Connect to Salesforce".
You might again be required to sign in to Salesforce here. Click the blue-button Allow once you've done that.
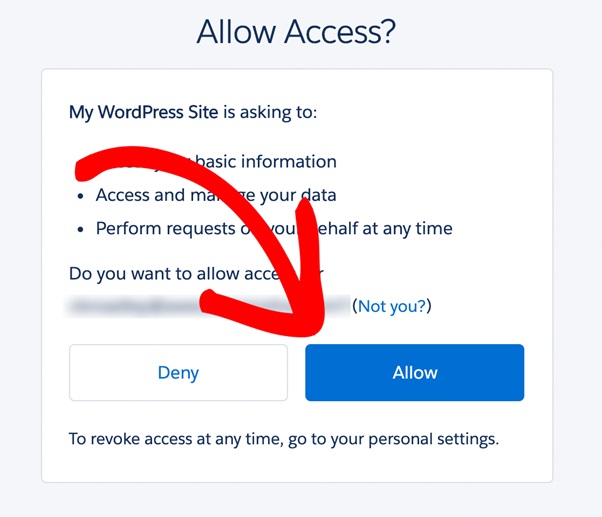
That's all there is to it! WordPress is connected to the Salesforce account.
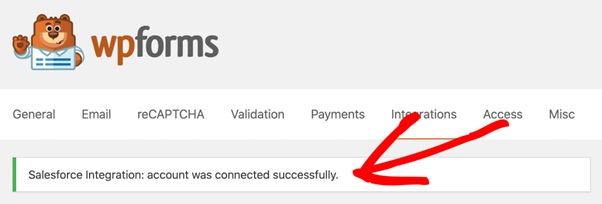
In WPForms, you could notice that we now had a successful message at the screen's top:
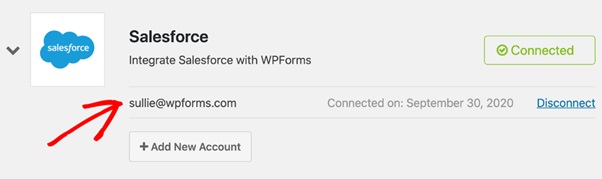
On the Integrations page, we also offer an account that is connected!
That's it for the difficult part. Now let us make a form.
Step 6. Creating a WordPress Salesforce Form
We're ready to submit data from the form to Salesforce now that we've set up our Salesforce WordPress connector. Return to this contact form page once you've finished customizing your form.
You can connect any form to Salesforce using WPForms. You can connect any form to Salesforce using WPForms. You could create:
- Cases
- Contacts
- Accounts
- Campaigns
- Products
- Opportunities
- Leads
In this instance, we'll use the contact form that we created to generate a lead.
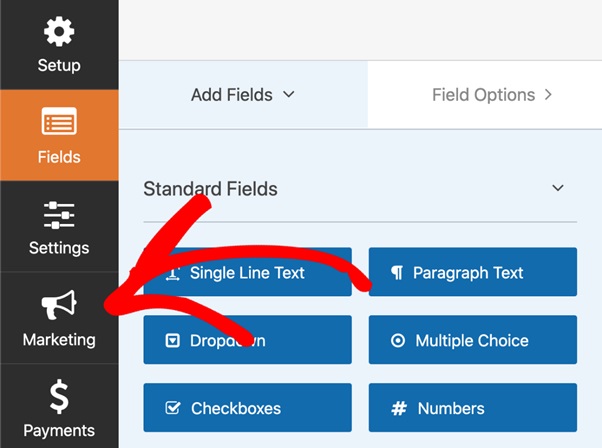
Begin by clicking Marketing over the left side of the form builder.
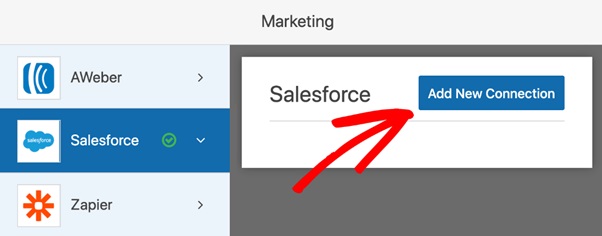
Click Salesforce from here. Then click the button "Add New Connection".
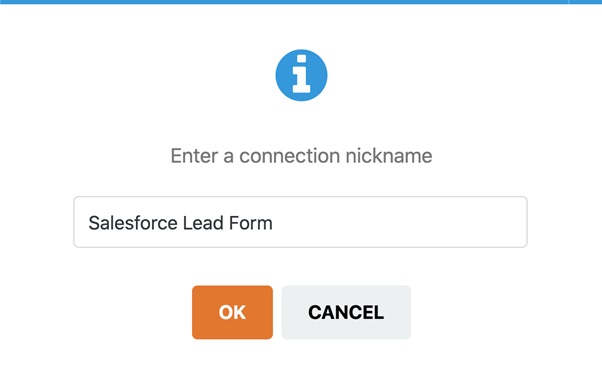
WPForms would prompt you to name your connection. This can be seen in a form builder, making it easy to find later.
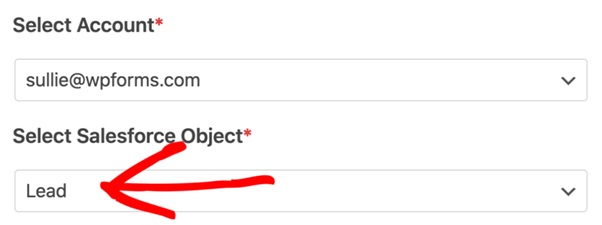
From the first dropdown, choose a Salesforce account that you created earlier. Let's go with Lead in the second one.
We'll map the contact form's fields to fields in our Salesforce account's leads area down below.

If you'd like, you could stop and save the form now. But there's one more trick. We may utilize sophisticated logic that is conditional to filtering the leads that are supplied to Salesforce automatically.
In our form, for instance, we asked when our visitors wanted to learn much regarding our product. We can select to send only the lead for Salesforce just if the visitor responded Yes when conditional logic is enabled.

That's the end of it. To save your work, simply click Save on the top of the page.
We're nearly finished!
Step 7: Salesforce Publish Integrating WordPress
This is the simplest of all. You don't need to use any code to publish the form.
This section only takes a short time.
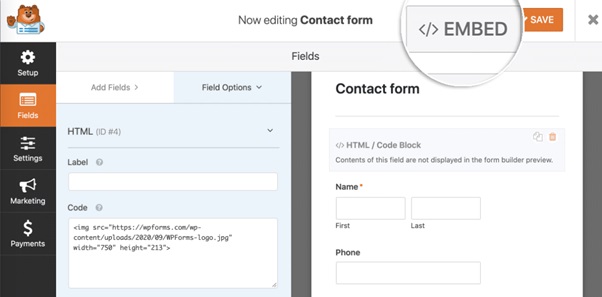
Click Embed on top of a form builder.
Now let us click the button "Create New Page".
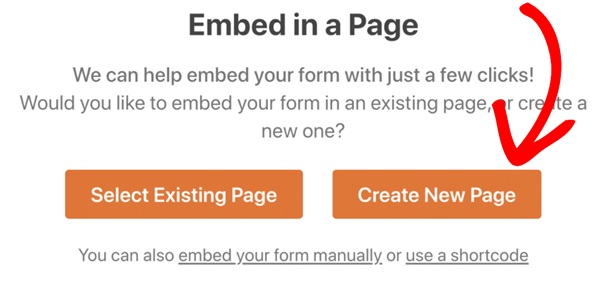
Here's where you'll give the new page a name.

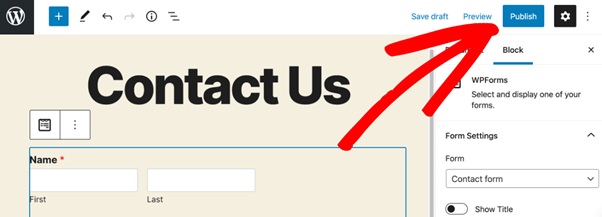
WPForms creates a WordPress page using your form included when you click the Let's Go button. To go live, all we have must do now is tap the button blue Publish.
We've completed our task! You may now test a form and make sure it's working properly. You'll see the following entry in Salesforce after you submit a form entry:
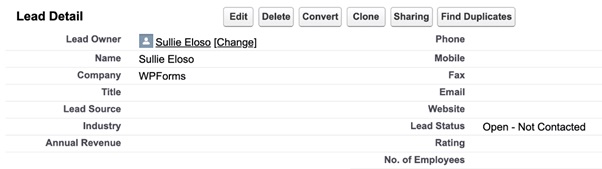
That's all there is to it! Your Salesforce WordPress integration is now live.
Conclusion:
We have now completed learning the steps for integrating WordPress with Salesforce successfully. In this article, we have explained the steps by using the necessary screens to make it simple to understand and we hope the readers have comprehended what needs to be implemented.
Tutorial and Images Reference: Salesforce Integrate with WordPress
Author Bio
I am Anusha Vunnam, Working as a content writer and Research Analyst in HKR Trainings. I Have good experience in handling technical content writing and aspire to learn new things to grow professionally. I am expert in delivering content on the market demanding technologies like Cyberark training,Workday training,Informatica Cloud training,salesforce training etc.