Home »
CSS
How to create a contact form with CSS?
Contact form with CSS: In this tutorial, we will learn how to create a contact form with different fields such as name, email, contact, etc. with the help of CSS?
By Apurva Mathur Last updated : July 26, 2023
Contact form with CSS
When you are doing a business through your website then forms are the essential elements as you get to know about the visitor. Forms are not only the way to register the information of the user but it is also the way how the user is connected to you. Whether it is a general query form, contact form, etc when users fill these forms it signifies your business is growing positively. Online forms allow a website owner to keep track of the number of visitors to the site.
Compared to the other forms contact forms have less number of fields, like name, email, and the question he/she wants to ask.
Steps to create a contact form with CSS
So, before jumping to the code we'll first see the tags which we'll use here. The steps to create a contact form with CSS are:
- The very first one is the form tag: <form> this is the most important tag when you want to create a form. As the same suggests all the elements you want in your form will be inside this form tag.
- Up next are the input fields which this form tag provides us there are many input types like checkbox, radio box, text, and number. Each has its unique functionality. In this article, we need two types of input: text and textarea.
Input type=text, this means the data which will be filled here will have a sequence of characters. Like your name field, email field, etc.
Input type=textarea, this type is generally used when you want to provide a large area to the user to write something like feedback or question, etc.
- Placeholders: Placeholders are the names that we want the user to see inside the field, these are not the permanent text; as soon as we click on the field this placeholder text disappears automatically. These are generally used to give hints to the user about the fields.
Example to create a contact form with CSS
<!DOCTYPE html>
<html>
  <head>
    <meta name="viewport" content="width=device-width, initial-scale=1">
    <style>
      body{
      font-family: "Lucida Calligraphy";
      }
      label{
      font-size: 20px;
      color: white;
      margin-right: 85%;
      }
      input[type=text],textarea {
      width: 100%;
      padding: 10px;
      border: none;
      border-radius: 4px;
      box-sizing: border-box;
      margin-top: 8px;
      margin-bottom: 20px;
      }
      input[type=submit] {
      background-color: #ee5253;
      color: white;
      padding: 15px 20px;
      border: none;
      border-radius: 4px;
      width: 100%;
      font-size: 15px;
      }
      form {
      border-radius: 5px;
      background-color: #10ac84;
      padding: 20px;
      width: 50%;
      }
    </style>
  </head>
  <body>
    <center>
      <form>
        <label >Name</label>
        <input type="text" placeholder="Enter your name">
        <label >Email Id</label>
        <input type="text"   placeholder="Enter your email Id">
        <label for="contact">Contact</label>
        <textarea id="contact"  placeholder="Write your message here"
          style="height:100px"></textarea>
        <input type="submit" value="Submit">
      </form>
    </center>
  </body>
</html>
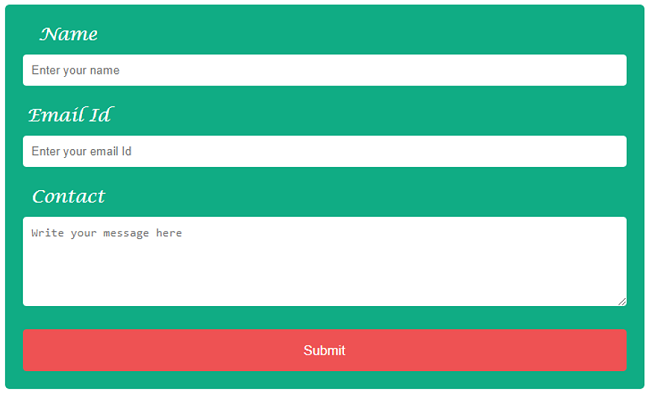
Output
Explanation
All the tags/ elements which are mentioned above are used in this code. CSS which is used here is optional; just try to run the code without the CSS and you'll see how basic your form looks.
To apply CSS on input type the syntax is really simple you just have to mention: - input [type=type name]
I've followed the same syntax to style all the input boxes. Rest all the basic properties are used to style these input boxes, all these properties are optional, try to add your CSS and play with your creativity.
CSS Examples »
Advertisement
Advertisement