Home »
Node.js
How to setup and use passport OAuth Facebook Authentication (Section 2) | Node.js
Node.js Authentication Series: Here, we are going to learn How to setup and use passport OAuth Facebook Authentication (Section 2) in Node.js?
Submitted by Godwill Tetah, on October 04, 2019
In my last article (How to set up and use passport OAuth Facebook Authentication (Section 1) | Node.js), we looked at another form of authentication called the OAuth authentication which involves sign in or signup using social media.
In this first section, we set up our Express app with some routes and our HTML form, installed passport-Facebook and configured the strategy.
In this section, we'll finally set up the authentication strategy it's self on the Facebook developers platform and tests our code.
In section 1, we created 2 files: app.js and index.html.
Create a file app.js and type the following code,
/*  EXPRESS SETUP  */

const express = require('express');
const app = express();

app.get('/', (req, res) => res.sendFile('index.html', {
    root: __dirname
}));

const port = process.env.PORT || 8080;
app.listen(port, () => console.log('App listening on port ' + port));
/*  CONFIGURATION  */

const passport = require('passport');
app.use(passport.initialize());
app.use(passport.session());

//success route
app.get('/success', (req, res) => res.send("You have successfully logged in"));

//error route
app.get('/error', (req, res) => res.send("error logging in"));

passport.serializeUser(function(user, cb) {
    cb(null, user);
});

passport.deserializeUser(function(obj, cb) {
    cb(null, obj);
});
<html>

<head>
    <title>Node.js OAuth</title>
</head>

<body>
    <center>
        <a href=auth/facebook>Sign in with Facebook</a>
    </center>
</body>

</html>
Final Steps
To authenticate with facebook, we need to set up some legal issues with the service provider (facebook).
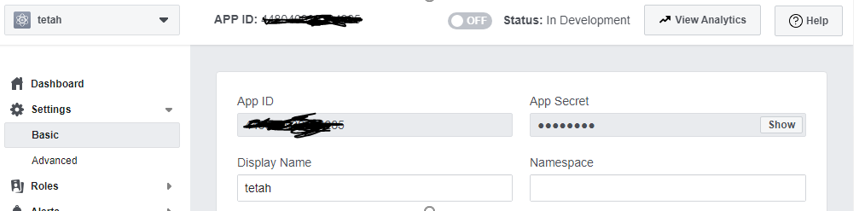
Open https://developers.facebook.com and create an app where you'll add your node app authentication url and also, you'll be given an APP_ID and APP_SECRET.
Note: Most articles have not emphasized on the fact that APP ID and APP SECRET can also be called clientID and clientSecret respectively.
Remember: Please your APP_ID and APP_SECRET should be confidential
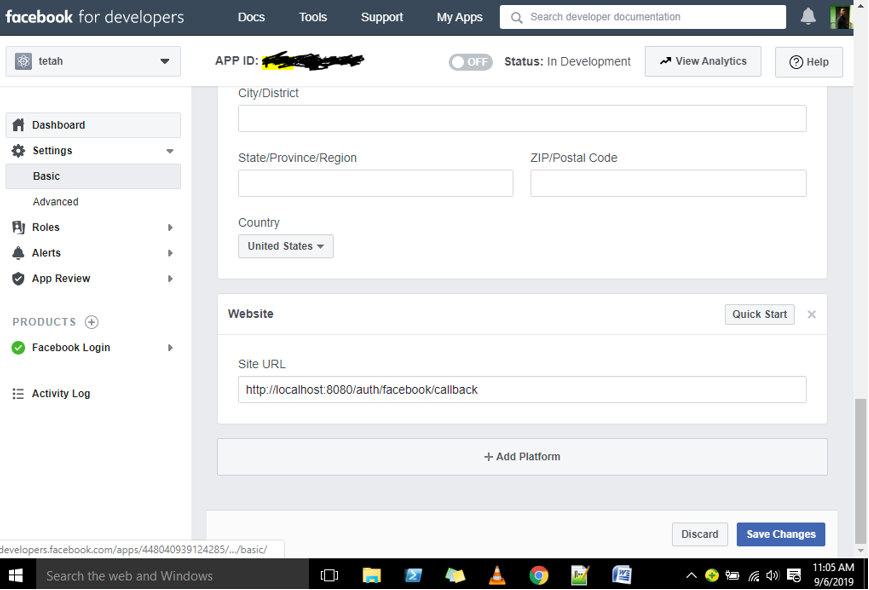
As you can see, the site url should be same with url connected to our sign in with facebook link.

To get your app id and app secret, click on settings and then move to basics.
Now that we have successfully gotten our app id and secret, let's apply them to our code.
Open the app.js file and add the following code below,
const FacebookStrategy = require('passport-facebook').Strategy;

const FACEBOOK_APP_ID = 'your app id';
const FACEBOOK_APP_SECRET = 'your app secret';

passport.use(new FacebookStrategy({
        clientID: FACEBOOK_APP_ID,
        clientSecret: FACEBOOK_APP_SECRET,
        callbackURL: "/auth/facebook/callback"
    },
    function(accessToken, refreshToken, profile, cb) {
        return cb(null, profile);
    }
));

app.get('/auth/facebook',
    passport.authenticate('facebook'));

/*
app.get('/auth/facebook',
 passport.authenticate('facebook', { scope: ['user_friends', 'manage_pages', 'user_photos'] }));
 */

app.get('/auth/facebook/callback',
    passport.authenticate('facebook', {
        failureRedirect: '/error'
    }),
    function(req, res) {
        res.redirect('/success');
    });
The code above proceeds to handle the authentication request putting into action the success and error routes depending on the results obtained from authentication.
The lines in the comment are used for permissions. The scope option asks the user permission to access certain important information like facebook pages, photos, friends and so on.
The code above can also be gotten from the passport js official website.
So if the user successfully logs in with his or her Facebook account, the web page will display ''you have successfully logged in''
Finally, let's run and see our output.
Open a terminal from your project folder and run the command.
Node app.js


You can also visit the official website of passport to learn more @ http://www.passportjs.org/
Thanks for coding with me! See you @ the next article. Feel free to drop a comment or question.