Home »
Python
Capturing mouse click events with Python and OpenCV
In this article, we will learn how to capture mouse click events with Python and OpenCV?
Submitted by Abhinav Gangrade, on July 12, 2020
Modules used:
In this article, we will use Python-openCV(cv2) and NumPy modules.
Python-opencv(cv2):
Python-opencv(cv2) is a python library that will help us to solve the open-source computer vision problems.
NumPy:
Numpy stands for Numerical Python. This library is used for scientific computing. In this article, we will use this module to create a blank black image.
How we can download these modules?
The general way to download these modules:
- python-opencv(cv2): pip install opencv-python
- Numpy: pip install numpy
- Pycharm users: Pycharm users can go to the project interpreter and install this module from there.
What we will do in this Article?
In this article, we will check the mouse click event, we will create a blank image with the help of NumPy and after that when we click the left button it will create a circle on the image and when we will click the right button it also create a circle of any color on the image. In this way, we will check the mouse clicking event of the mouse.
Important Function we will use in this Article:
- np.zeros((<size with layer>),np.uint8): This Function will create a blank Image.
- cv2.setMouseCallback(<Image Frame>,<Event Capturing Function>): This Function will check the mouse clicking function and do the following actions according to the Event capturing Function.
Program:
# import modules
import cv2 ,numpy as np

# set the window name
window="Include Help"

# create a blank image
# the image size is (512,512) and 3 layered
image=np.zeros((512,512,3),np.uint8)

# set the name to the window
cv2.namedWindow(window)

# Create the Event Capturing Function
def capture_event(event,x,y,flags,params):
    # event= click of the mouse
    # x,y are position of cursor
    # check the event if it was right click
    if event==cv2.EVENT_RBUTTONDOWN:
        # create a circle at that position
        # of radius 30 and color red
        cv2.circle(image,(x,y),30,(0,0,255),-1)
    # Check if the event was left click
    if event==cv2.EVENT_LBUTTONDBLCLK:
        # create a circle at that position
        # of radius 30 and color greeen
        cv2.circle(image,(x,y),30,(0,255,0),-1)
    #  check if the event was scrolling
    if event==cv2.EVENT_MBUTTONDBLCLK:
        # create a circle at that position
        # of radius 30 and color  blue
        cv2.circle(image,(x,y),30,(255,0,0),-1)

# set the mouse settin function
cv2.setMouseCallback(window,capture_event)

# create a loop untill we press the button
while True:
    cv2.imshow(window,image)
    if cv2.waitKey(1)==13:
        break
cv2.destroyAllWindows()
Output:
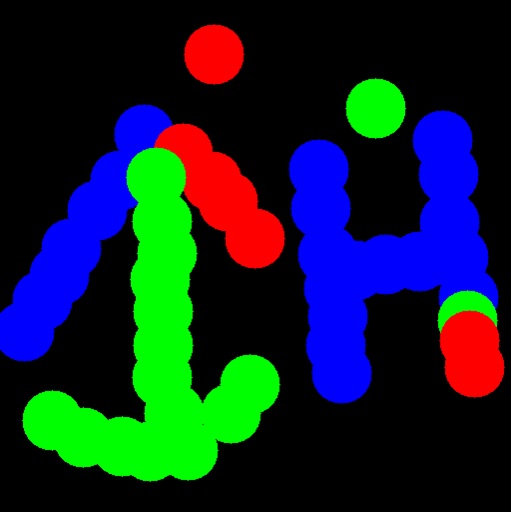
In this way, we can capture the mouse click event with the help of Python-opencv(cv2).