Home »
Python
Print ‘Hello World’ using Python and PyQT -2 (Practical)
Print ‘Hello World’ using Python and PyQT -2 (Practical): This article will cover the practical implementation of those terms we studied in previous articles (Print ‘Hello World’ using Python and PyQT (first PyQT program) and Print ‘Hello World’ using Python and PyQT -2 (Theory)). Here, we will learn the second method to create and run GUI apps, say a simpler method. And, believe my words whether you love codes or not, but you would certainly love this one. We will create the same "Hello World" layout using Qtdesigner, a drag and drop way. Like you are always welcome to do so, feel free to ask any query in comment section.
Submitted by Atul Anand, on December 04, 2017
The first GUI program (QtDesigner)
Since, I have promised to teach you a simpler method; I am stating it as simple as possible. Let’s break it into few steps:
- Design your GUI with drag and drop tools in Qtdesigner.
- Save it with '.ui' extension.
- Convert it into executable python file.
- Run the python file.
Now, I am elaborating these steps to make you go comfortable.
Step 1:
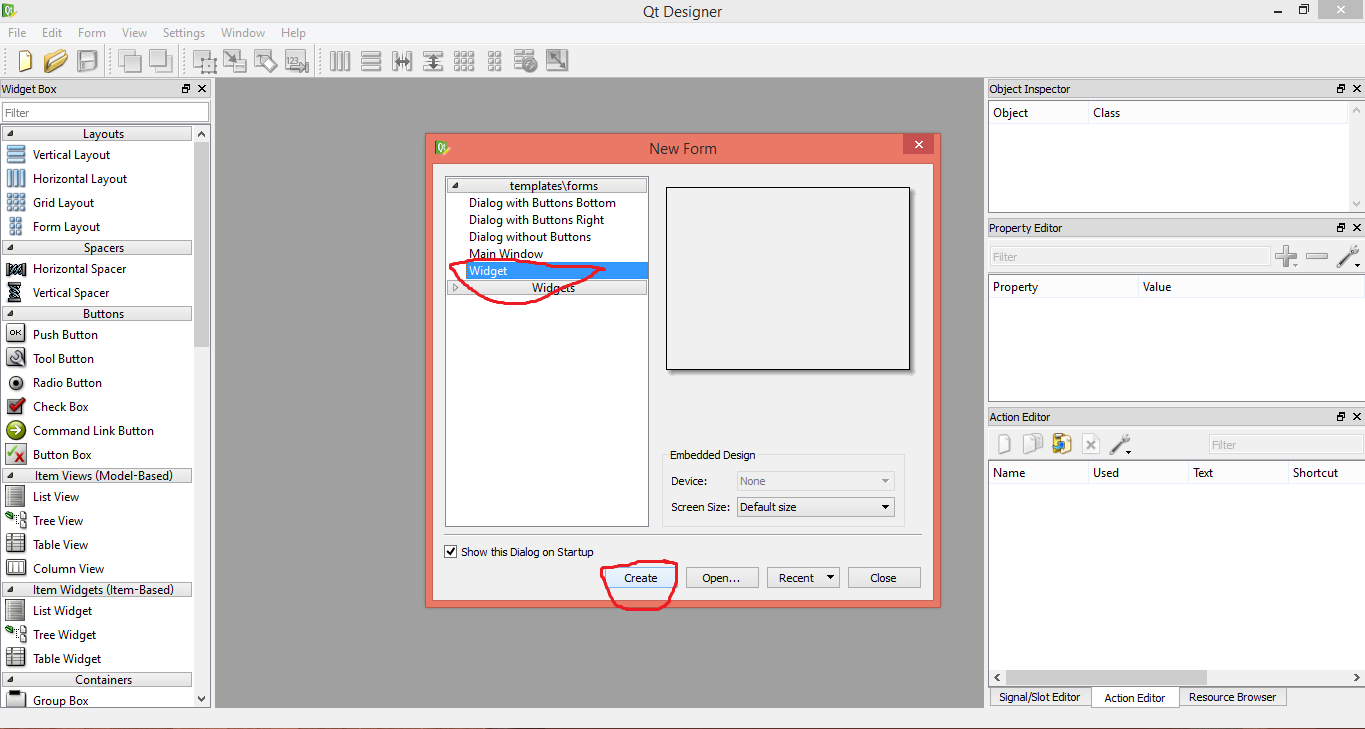
• Open Qtdesigner.
• Select widget and click on create.
• Select and drag and drop "Label" in the widget area.
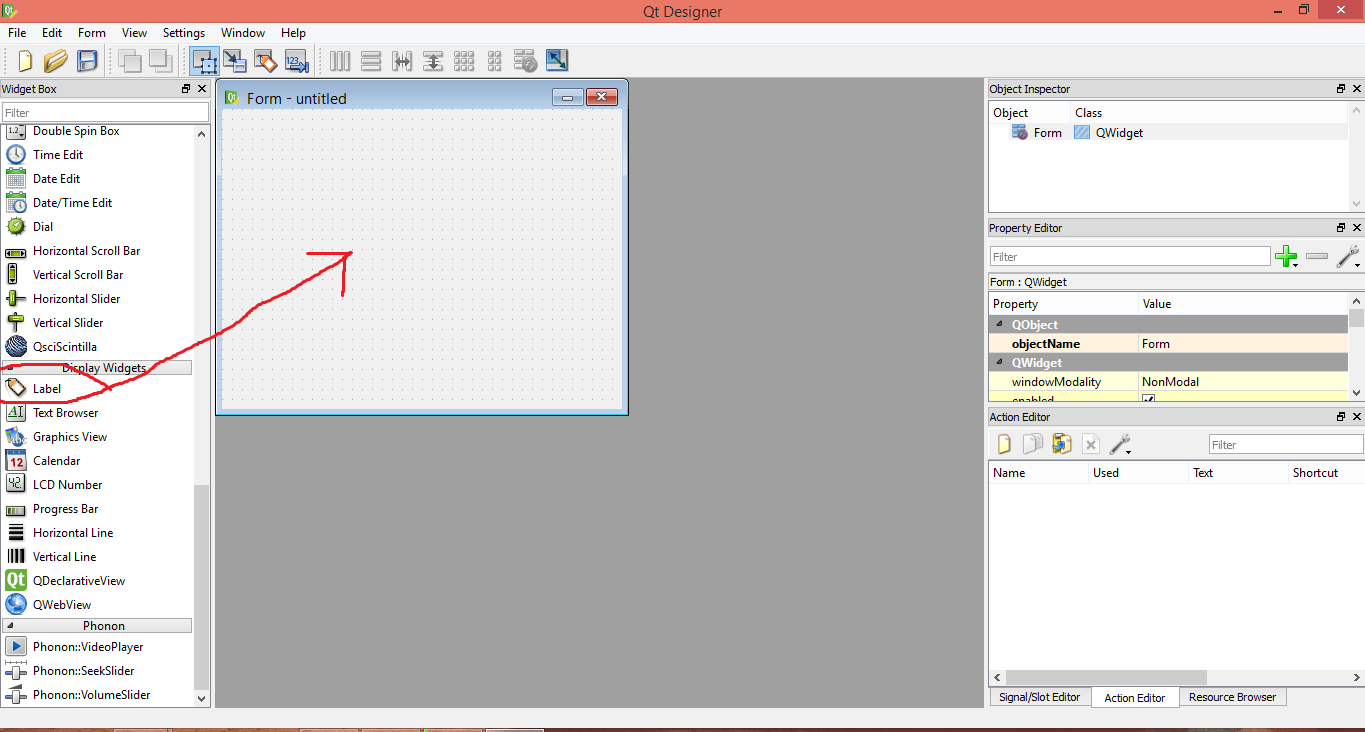
• Write "Hello World!" You are done with this step. Either go to next step or follow this procedure below if you want to customize it and look attractive:
- Resize the layout by pointing at its exteriors or corners and shifting mouse pointer.
-
Go to property editor on the right side of IDLE:
- Change Font size and style by clicking on "value" part of the "font" Property. (See, below figure -1)
- Change alignment of text by scrolling down to LABEL field, and clicking on "value" part of "alignment" Property. (See, below figure -2)
 Figure -1
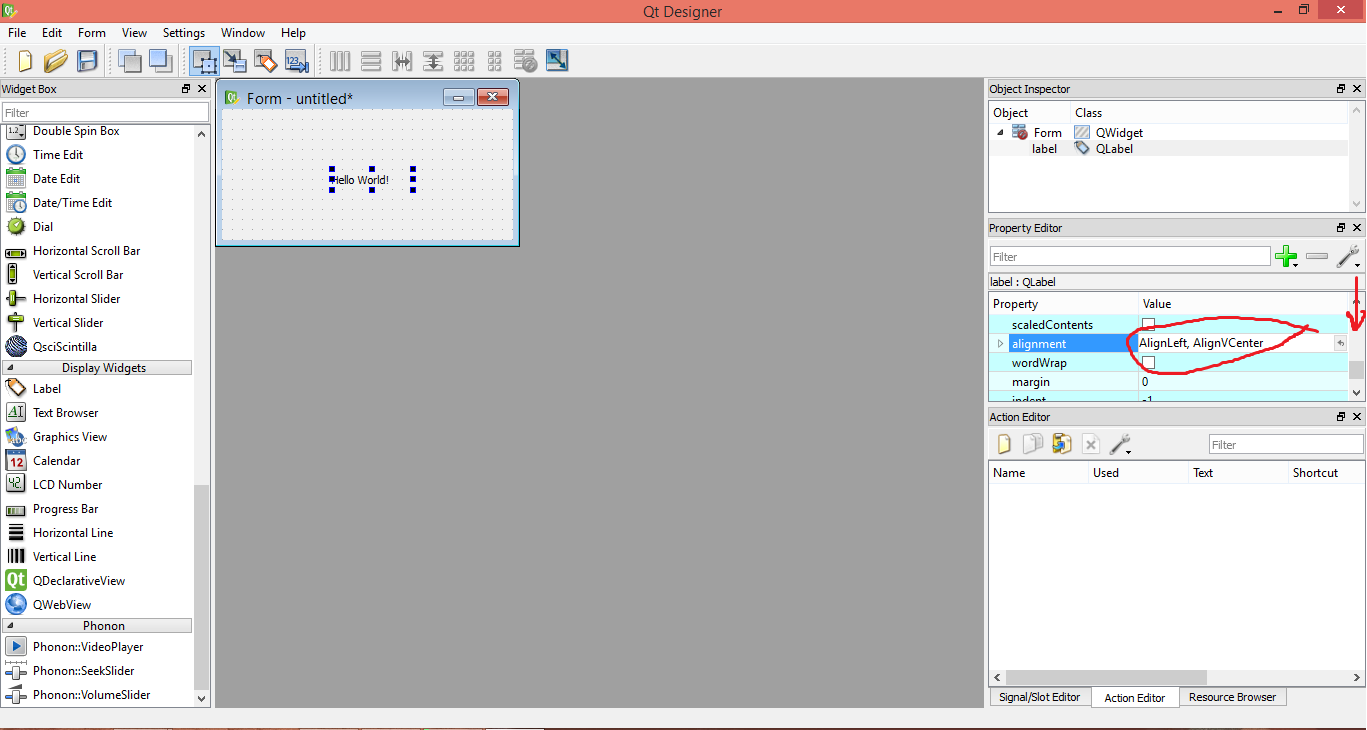 Figure -2
Step 2:
Save it on your desired location in your project folder. Ensure that its extension is ".ui".
Note: This is the content of the xml file for whatever we have designed yet
XML file
<?xml version="1.0" encoding="UTF-8"?>
<ui version="4.0">
 <class>PrintHELLO</class>
 <widget class="QWidget" name="PrintHELLO">
  <property name="windowModality">
   <enum>Qt::ApplicationModal</enum>
  </property>
  <property name="geometry">
   <rect>
    <x>0</x>
    <y>0</y>
    <width>259</width>
    <height>62</height>
   </rect>
  </property>
  <property name="font">
   <font>
    <family>Segoe Script</family>
    <pointsize>12</pointsize>
    <italic>true</italic>
   </font>
  </property>
  <property name="windowTitle">
   <string>printHELLO</string>
  </property>
  <layout class="QFormLayout" name="formLayout_2">
   <property name="fieldGrowthPolicy">
    <enum>QFormLayout::AllNonFixedFieldsGrow</enum>
   </property>
   <item row="0" column="1">
    <widget class="QLabel" name="label">
     <property name="text">
      <string>Hello World!</string>
     </property>
     <property name="alignment">
      <set>Qt::AlignCenter</set>
     </property>
    </widget>
   </item>
  </layout>
 </widget>
 <resources/>
 <connections/>
</ui>
Step 3
Convert xml file to executable python file. Follow the steps provided in the pyuic4 Section.
Note: I am providing here the source code for python file. This is just to make you familiar with the body of the code. You don’t need to bother about the code content at this phase. As we, will do some modifications in the later stage , if required. This is the content of the python file for whatever we have designed yet
# -*- coding: utf-8 -*-
# Form implementation generated from reading ui file 'NEW.ui'
# Created by: PyQt4 UI code generator 4.11.4
# WARNING! All changes made in this file will be lost!
from PyQt4 import QtCore, QtGui
try:
    _fromUtf8 = QtCore.QString.fromUtf8
except AttributeError:
    def _fromUtf8(s):
        return s

try:
    _encoding = QtGui.QApplication.UnicodeUTF8
    def _translate(context, text, disambig):
        return QtGui.QApplication.translate(context, text, disambig, _encoding)
except AttributeError:
    def _translate(context, text, disambig):
        return QtGui.QApplication.translate(context, text, disambig)
class Ui_PrintHELLO(object):
    def setupUi(self, PrintHELLO):
        PrintHELLO.setObjectName(_fromUtf8("PrintHELLO"))
        PrintHELLO.setWindowModality(QtCore.Qt.ApplicationModal)
        PrintHELLO.resize(259, 62)
        font = QtGui.QFont()
        font.setFamily(_fromUtf8("Segoe Script"))
        font.setPointSize(12)
        font.setItalic(True)
        PrintHELLO.setFont(font)
        self.formLayout_2 = QtGui.QFormLayout(PrintHELLO)
        self.formLayout_2.setFieldGrowthPolicy(QtGui.QFormLayout.AllNonFixedFieldsGrow)
        self.formLayout_2.setObjectName(_fromUtf8("formLayout_2"))
        self.label = QtGui.QLabel(PrintHELLO)
        self.label.setAlignment(QtCore.Qt.AlignCenter)
        self.label.setObjectName(_fromUtf8("label"))
        self.formLayout_2.setWidget(0, QtGui.QFormLayout.FieldRole, self.label)

        self.retranslateUi(PrintHELLO)
        QtCore.QMetaObject.connectSlotsByName(PrintHELLO)

    def retranslateUi(self, PrintHELLO):
        PrintHELLO.setWindowTitle(_translate("PrintHELLO", "printHELLO", None))
        self.label.setText(_translate("PrintHELLO", "Hello World!", None))


if __name__ == "__main__":
    import sys
    app = QtGui.QApplication(sys.argv)
    PrintHELLO = QtGui.QWidget()
    ui = Ui_PrintHELLO()
    ui.setupUi(PrintHELLO)
    PrintHELLO.show()
    sys.exit(app.exec_())
Step 4
Run the python file. Yup, we are done now.
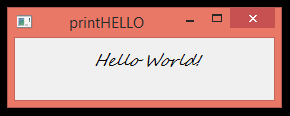
Output
Summary
This way, we have printed “Hello World!" as a more customized outcome. And, mind bobbling complexities with the code was also eradicated. Yes, after this you have reached to an equivocal situation. Its only you who is going to decide which method suits you. I will discuss both methods whenever needed. But I will prefer drag and drop method as my favorite one, since it provides me with speed. But, you don’t worry. Whenever you want to ask for any doubt put your query in the comment section. Catch you later in next article. HAPPY LEARNING!