Home »
CATIA Tutorial
CATIA – Designing a Mug Using Shaft Feature
Learn how to design a Mug Using Shaft Feature in CATIA?
Submitted by Benisha Lama, on February 27, 2022
Shaft: You can create shafts from sketches including several closed profiles. These profiles must not intersect and they must be on the same side of the axis. Moreover, you can define whether you need the whole sketch or sub-elements only.
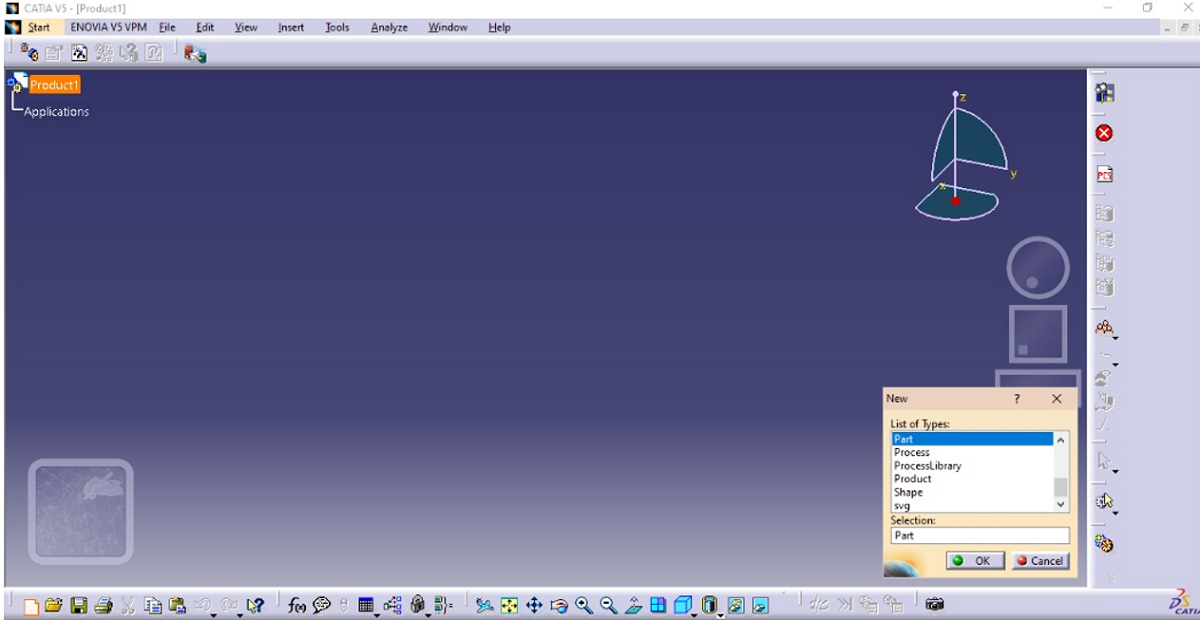
Step 1: Start by opening the software, then proceed to open a new file then select a Part design.
This screen will be displayed.
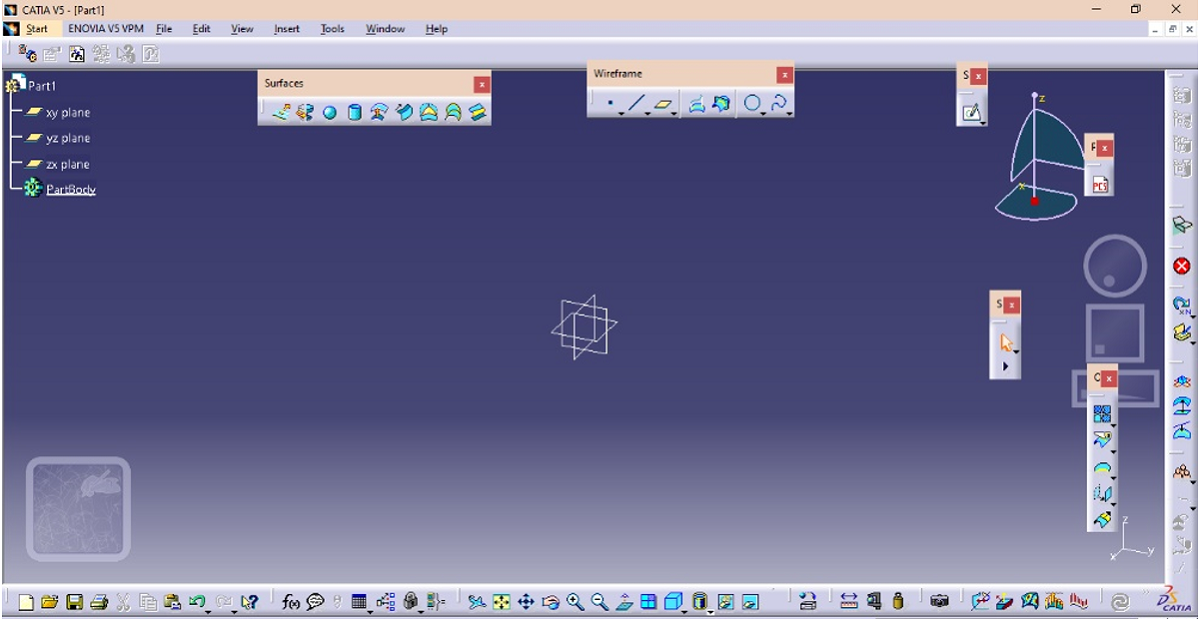
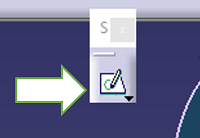
From there click on the sketch option after selecting the plane on which the design has to be created.
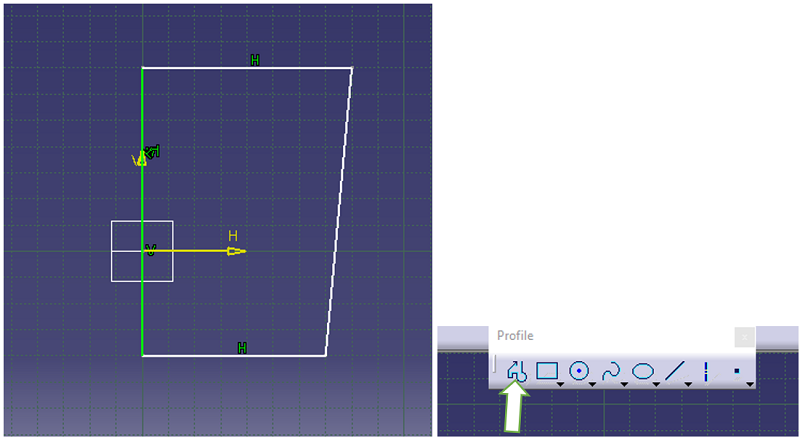
Step 2: In the sketch workbench, select the line option from the profile dialog box and draw a figure the same as below.
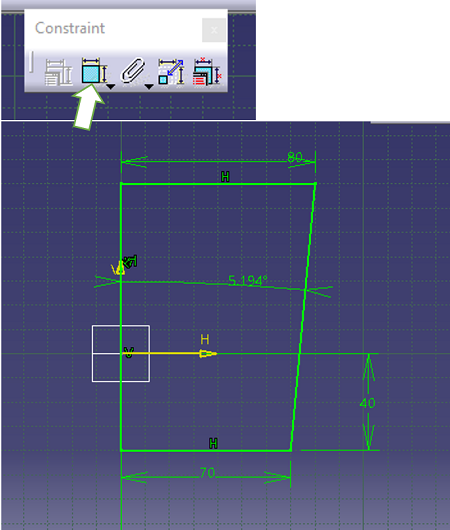
Step 3: Constraint the sketch using the constraint option.
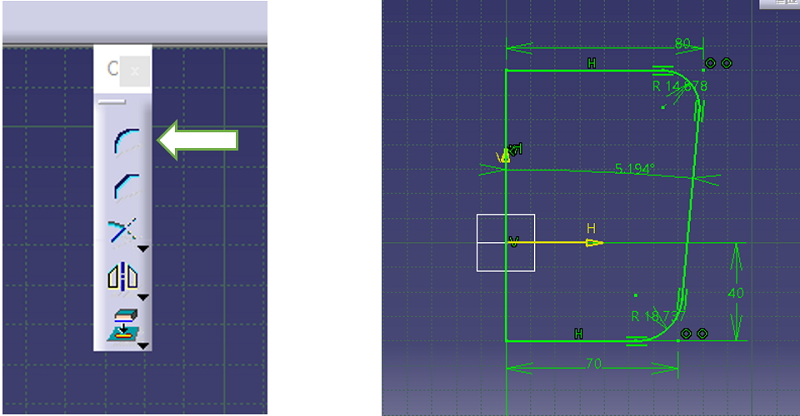
Step 4: The mug that has to be designed will be a bit circular so create curves on creating a curve on the top right and bottom right side of the sketch by utilizing the curve option.
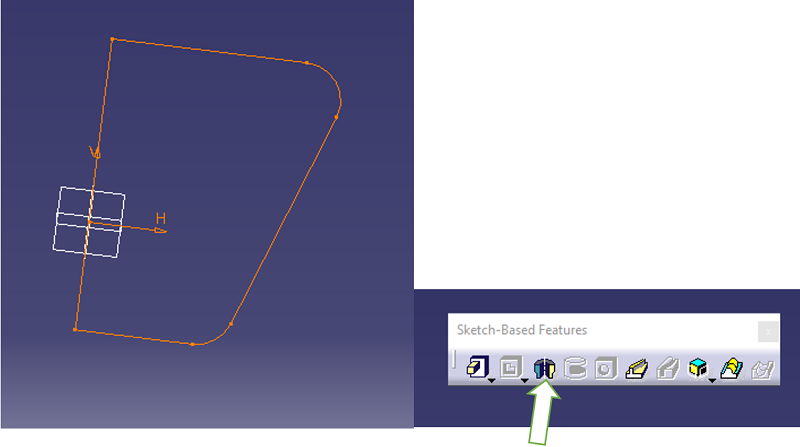
Step 5: Exit the sketch workbench, then from the sketch-based feature select the shaft option and click on the profile that was done earlier.
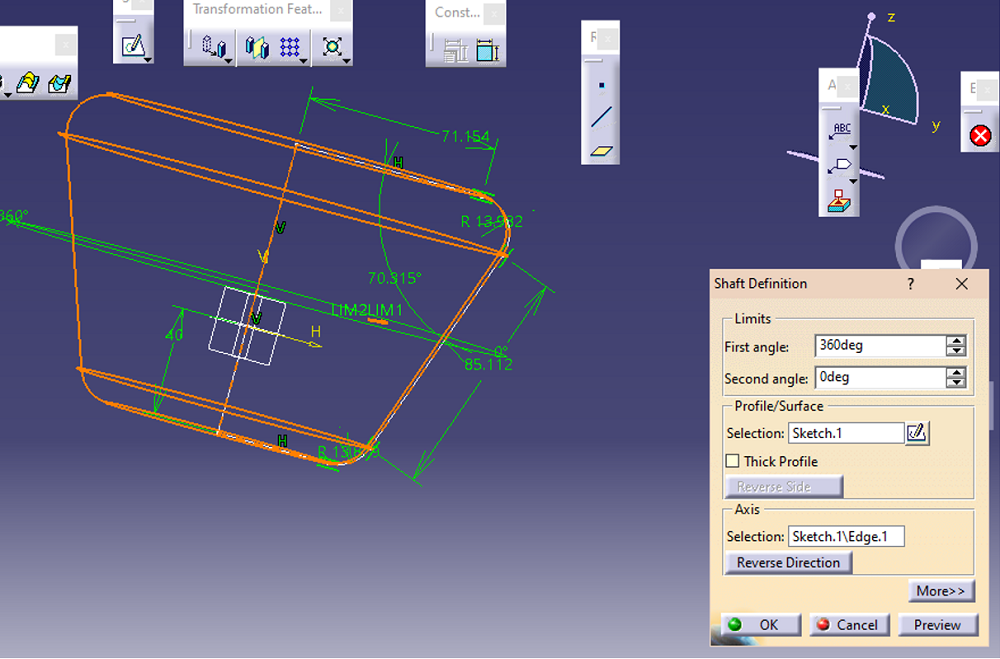
Step 6: After selecting the sketch set the limits of the angle. The shaft feature not only fills the drawing along with that it gives a 3d dimension to the sketch. Click Ok after the dimensions are set.
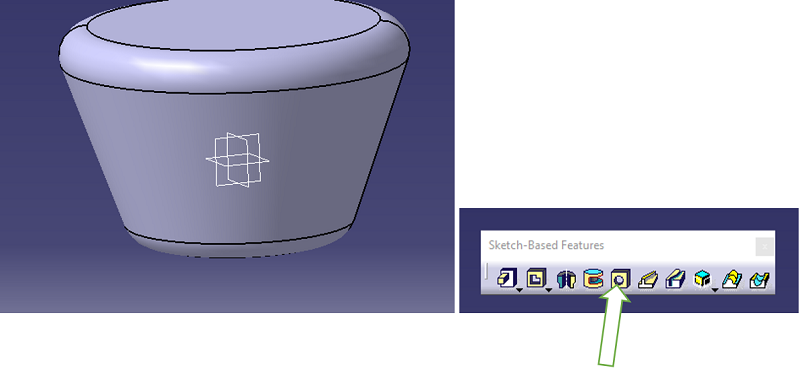
Step 7: The mug has to have a hole in the so to create a hole, select the hole option from the sketch-based feature.
Step 8: Set the hole diameter from the hole definition dialog box and click Ok.

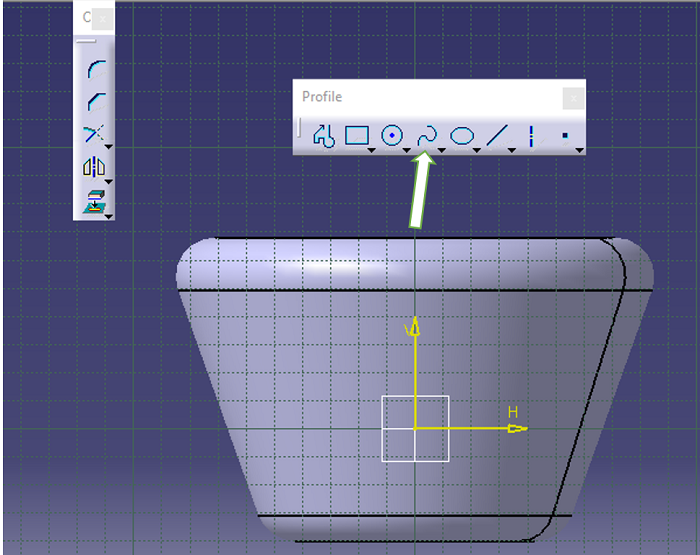
Step 9: The handle for the mug has to be created so select the face of the mug then enter the sketch workbench. From there on select the free curve line option to draw the handle.
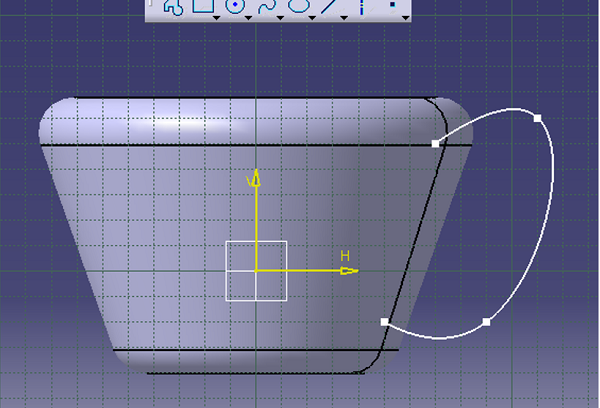
Step 10: Draw the handle from the top to the bottom. Then exit the sketch workbench.
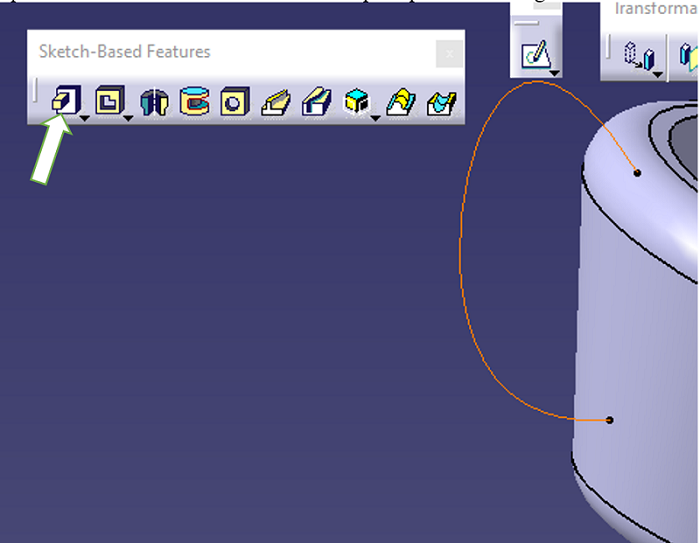
Step 11: To make the handle 3D click on the pad option as it will give the sketch the definition that it needs.

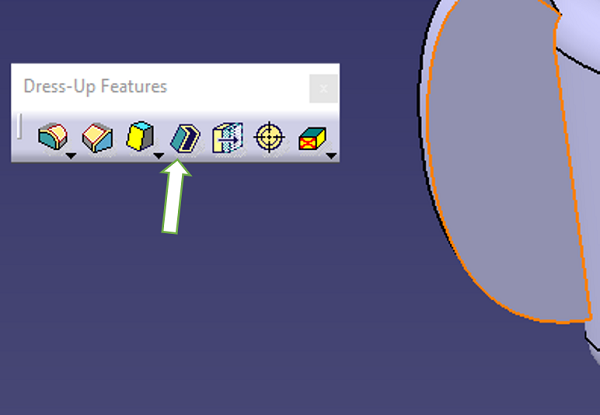
Step 12: To make the hollow space on the handle, click on the shell option from the dress-up feature.
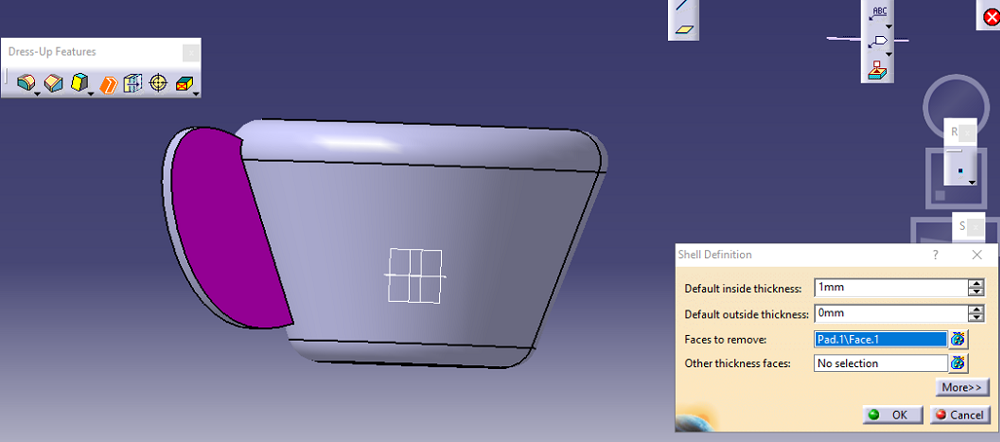
Step 13: Select the two faces of the handle then set the inside thickness through the shell definition dialog box. Click OK when done.
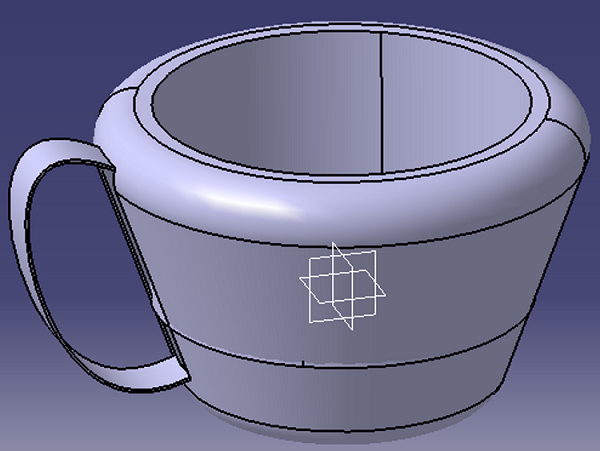
Result:
Advertisement
Advertisement