Home »
CSS
The '+' (plus sign) CSS selector
CSS | + Selector: Here, we are going to learn about the '+' (plus sign) CSS selector with its syntax and examples.
Submitted by Anjali Singh, on February 08, 2020
Introduction:
Although we may know about various properties and elements used in developing a website or web page, it is equally important to get to know about various selectors that can be used for developing a website or a web page. These selectors prove to be very useful and can come in handy anytime. Now, to start with, there are many selectors available that can be used for various purposes and every selector serves a different function. So, making use of selectors should be done wisely. Now, to keep this article short and understandable, all of the selectors are not discussed here rather we will be focusing on only one of them.
Necessity:
Now, that we are familiar with the selectors and their importance in the web page or website development, why don't we move forward with the topic? So talking about "+" or "plus sign" selector, is not that very tough to understand and implement. You should learn about the "+" or "plus sign" selector's behavior as you might feel the need of using this selector sometime in the future. Not just this selector try to learn about as many selectors as you can because learning is developing! Well, as said earlier the "+" or "plus sign" selector is no big deal to understand, well then let's get on with it.
Definition and use:
The elaborated definition and use of "+" or "plus sign" selector is written below, although the definition might sound a bit confusing but don’t worry about that just keep on reading further and everything will be made clear to you.
The + (plus sign) selector in CSS is used to select the elements that are placed immediately next to the specified element but not inside the specified element. Sounds a bit confusing right? But don’t worry, that is exactly why there is an example below to help you understand about "+" or "plus sign" selector more clearly.
Syntax:
    element1 + element2{
        //CSS Properties
    }
Example:
<!DOCTYPE html>

<html>

<head>
    <style>
        div + p {
            background-color: #f40;
        }
    </style>
</head>

<body>
    <h1>The "+" (plus sign) CSS selector</h1>
    <div>
        <p>This is IncludeHelp.</p>
    </div>
    <p>InlcudeHelp is the answer for all your problems.</p>
    <p>Whenever in a doubt ,go and google IncludeHelp.</p>
</body>

</html>
Output
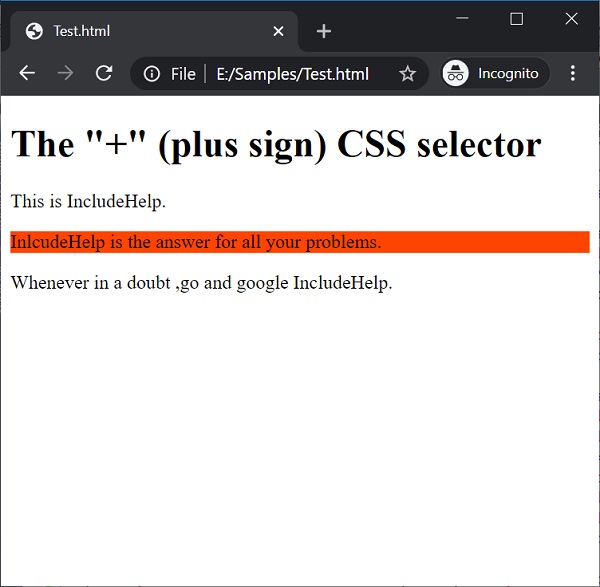
In the above example, it can be clearly seen that by making use of "+" or "lus sign" selector the div is replaced by p element.
Try it out:
So, now that you have learned something new, it’s time to try it out yourself. So go ahead and give it a shot and if you get stuck anywhere, you can always come back to the example above. If you feel the need to get some expert advice for your queries. Visit https://ask.includehelp.com/.
CSS Tutorial & Examples »
Advertisement
Advertisement