Home »
Articles
Azure Machine learning - The non-coder's machine learning tool
In this article, we would be looking at web-based machine learning module launched by Microsoft azure.
By Raunak Goswami Last updated : March 28, 2024
By looking at the title you must be thinking why am I calling Azure Machine learning a non-coder's machine learning tool? Well, the answer is pretty simple you don't have to be a professional coding expert to perform predictive analysis on azure machine learning, even a non-technical guy with some knowledge about the basic machine learning terms can use this.
Microsoft has always been known for its amazing GUI based OS, the drag and drop feature is a signature feature in all the windows OS made the windows a popular choice among the customer when it comes to using a user-friendly operating system and following the same principle, it launched a web-based machine learning studio. You just have to drag the datasets to visualize and you have to connect them to various functions using drag and drop through your mouse to perform the predictive analysis isn't it cool? Surely it is.
Another striking feature that this machine learning studio offers is the set of predefined datasets that already uploaded on the Azure cloud. You too can upload your data set in Azure cloud and can save tons of space in your hard drive. Enough talking now let's look at how to get started on Azure machine learning studio (ML Studio).
Prerequisite for Azure Machine learning
Before starting make sure you have a Microsoft account because you need to log in to your Microsoft account in order to use the ML studio. After that just go to the following link: https://studio.azureml.net/
Microsoft Machine Learning Studio
You need to sign in, if you want to use ML studio after that just select an option for a free workspace, it offers all the basic features required for personal use.
Step 1
Now you will come a across a web page like this...
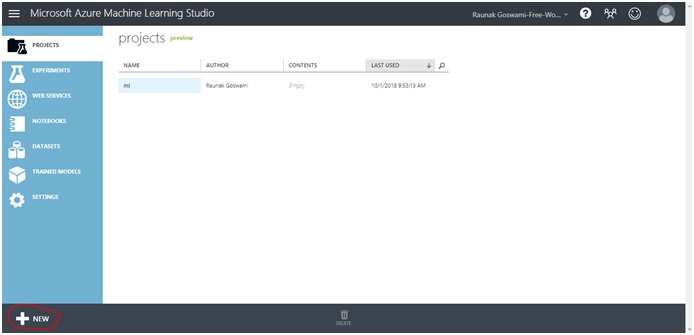
Step 2
Now click on the new button and then select the experiment option you will see the following page...
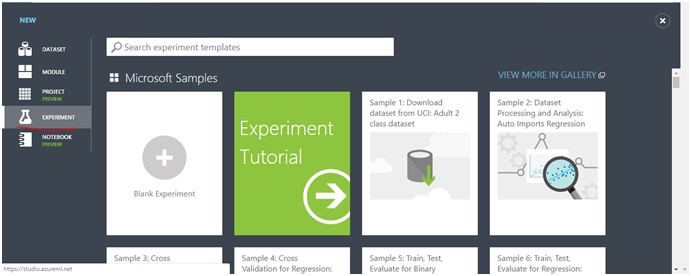
Step 3
After that just click on the blank experiment and you will see the following page...
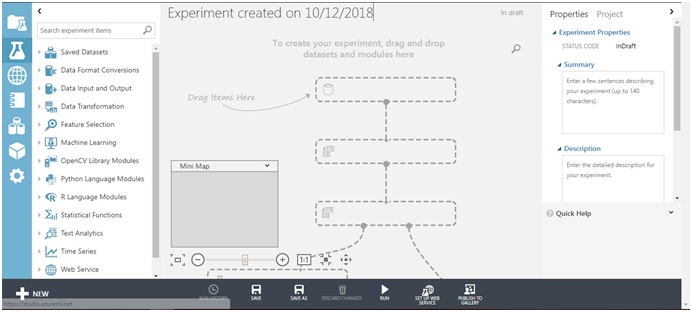
Step 4
From the picture you can clearly see how well the Microsoft has developed its machine learning studio, as you see you can clearly see a line which says "drag items here", it basically tells you to drag datasets and various machine learning modules directly to workspace and connect them for example just click on the saved datasets option and click on samples ,you will see a drop-down menu showing various saved data sets.
Just drag any of the data set to the work space and you will come across something like this...
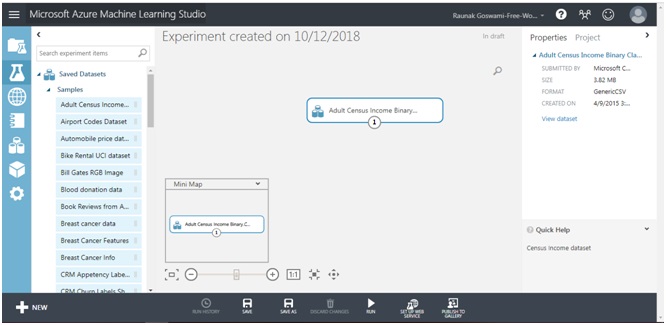
Step 5
You have an option to visualise the following data set too just left click on the data set inside the workspace and select visualise and you will see the following interface.
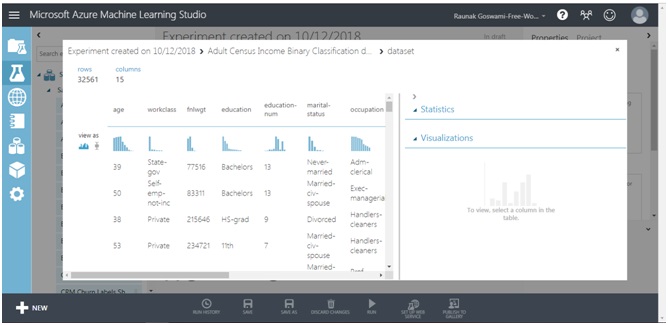
Just click on any column to see a visualized histogram to analyze the selection of proper features to select the target values. You can then select the project column option to select the desired columns you want in your dataset. There are a variety of other options available just drag and drop to see for yourself, this was all about the basics of ML studio.
Advertisement
Advertisement