Home »
CATIA Tutorial
CATIA – Using the Pocket Feature to Create a Pocket in a Cuboid
Learn how to use the pocket feature to create a pocket in a cuboid in CATIA V5?
Submitted by Benisha Lama, on February 22, 2022
Before creating a hole in a cuboid, learn how to create a cuboid?
Usage of Pocket Feature
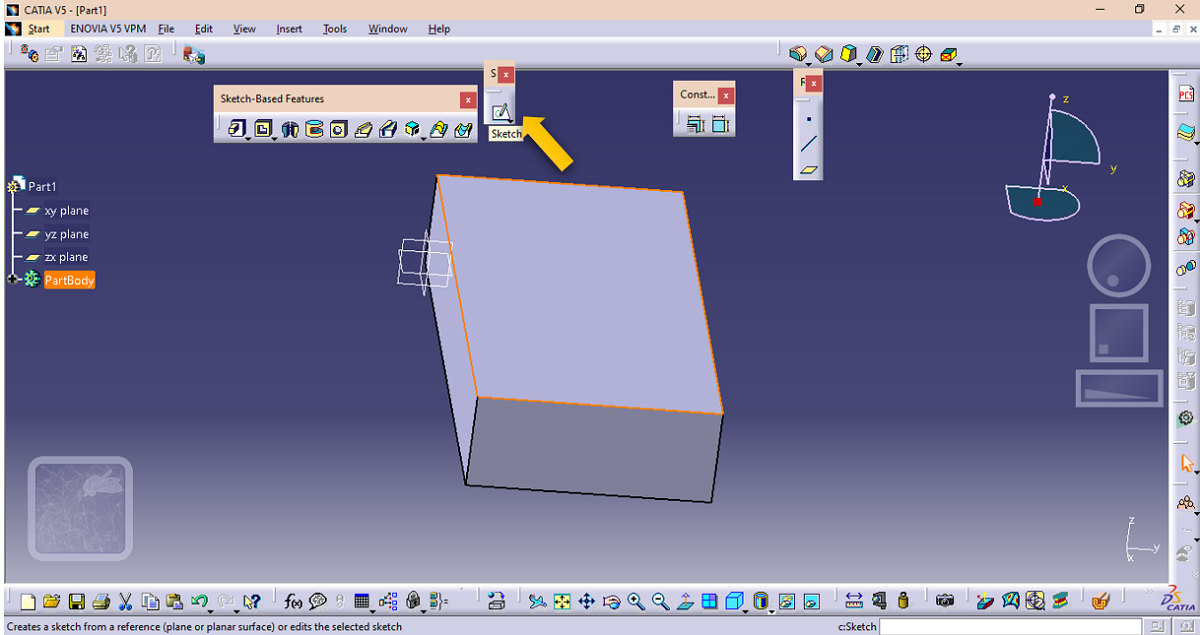
Step 1: Select the face of the cuboid, the face will be the one in which the cuboid will be created. Select the face and then click on the sketch workbench.
It will be directed to the workbench window, where it will display this.

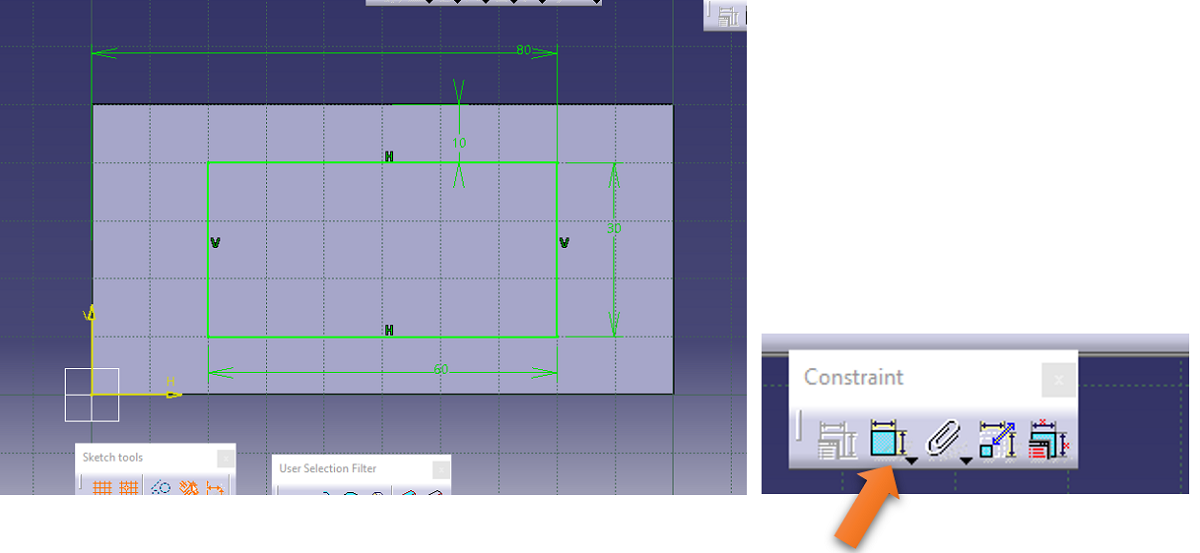
Step 2: Select the rectangle option from the profile dialog box, procced further and draw a rectangle inside the face of the cuboid like below. Constrain the rectangle using the constraint feature.
Step 3: Exit the workbench. The cuboid will have a white rectangle on the face that you have chosen to draw the rectangle on.
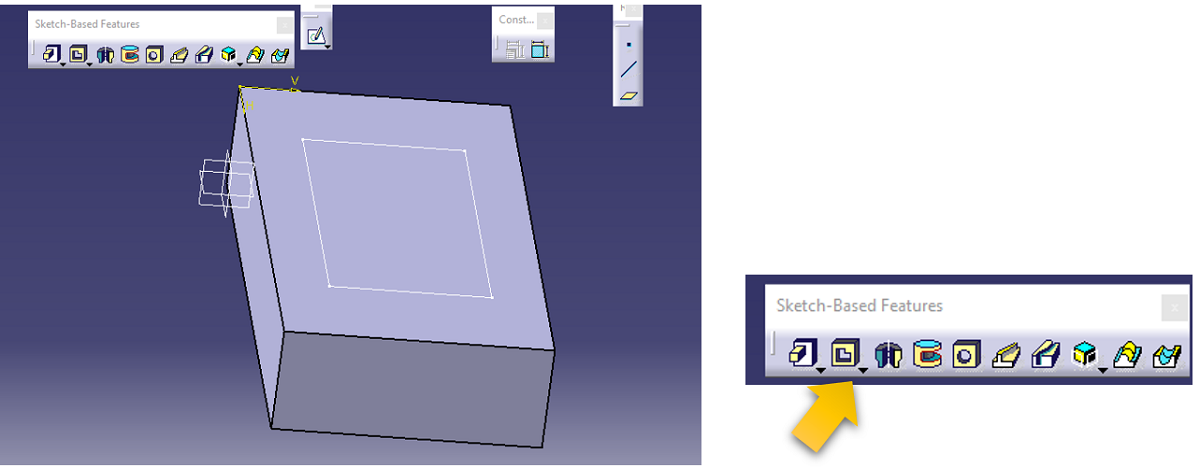
Click on the pocket option from the sketch-based feature.
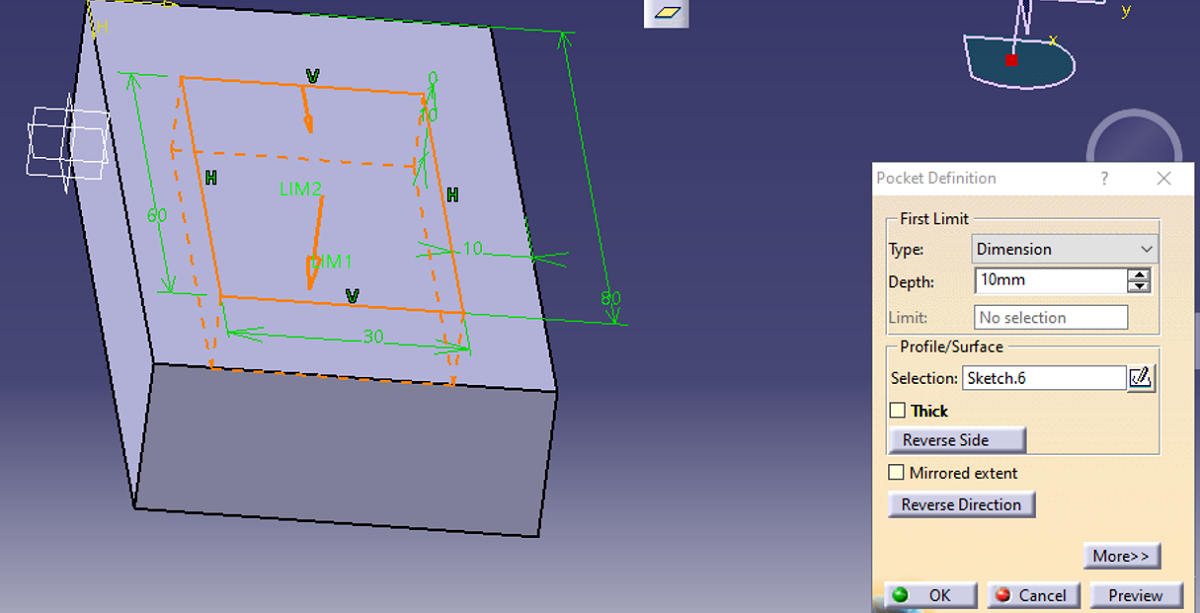
Step 4: Select the white rectangle line and then click the pocket option as mentioned earlier. Pocket definition dialog box will appear where the corresponding dimensions are filled. Click on OK after all the necessary filling has been done.
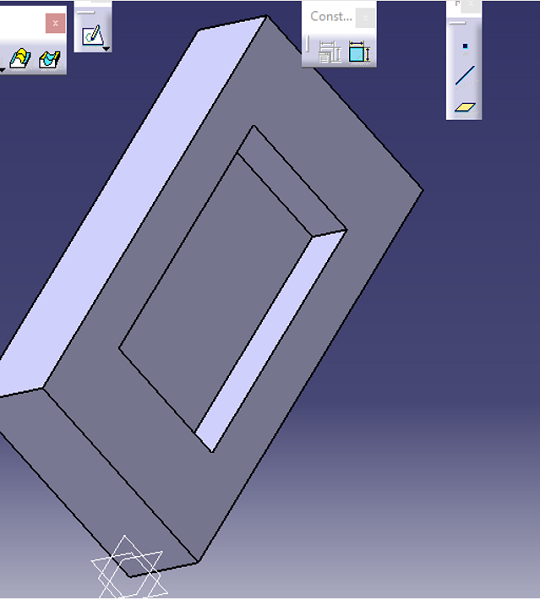
Result:
Advertisement
Advertisement