Home »
Electron JS
Electron JS | Submenu and Roles
Electron JS | Submenu and Roles: Here, we are going to learn about the creating submenus and adding roles in Electron JS.
Submitted by Godwill Tetah, on June 15, 2020
See, how simple it is to create a submenu in Electron JS and add roles? In one of my recent articles, I handled how to add or customize the menu in an Electron JS app.
Submenu
As I mentioned earlier, adding submenu and role in an Electron JS application's menu is very simple as long as you have already added a menu.
You can check out my article on adding or customizing an app's menu from my list of articles.
From an application's menu, using buildFromTemplate, as shown below,
const electron = require ('electron')

const app = electron.app // electron module
const BrowserWindow = electron.BrowserWindow //enables UI
const Menu = electron.Menu // menu module

app.on('ready', _ => {
    new BrowserWindow()
    const template = [
        {
            label: 'Help',

        },
        {
            label: 'File',
        },
        {
            label: 'Edit',

        },
        {
            label: 'View',

        },
        {
            label: 'Run',

        }
    ]
    const menu = Menu.buildFromTemplate (template)
    Menu.setApplicationMenu (menu)
})
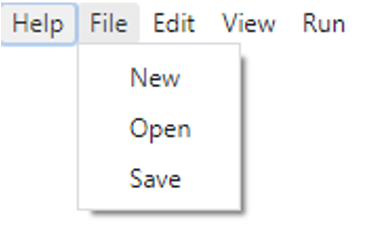
A submenu can be added by simply adding a submenu property whose value contains the submenu items in an array as shown below;
Edit the code above and add the following lines,
{
	label: 'File',
	submenu: [{label:'New'},{label:'Open'},{label:'Save'}]
},
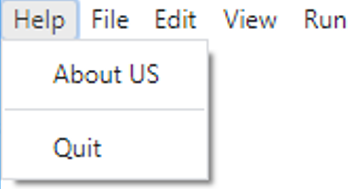
You may be wondering how the submenu items can be separated by a horizontal line. It can be done using a separator. We will add the separator in a different submenu so that it can be seen clearly.
Roles
Roles are simply some commands that execute a particular action. These commands are built-in by the Electron JS developers.
Roles are important because it saves us the time to program the actions manually.
Electron JS official documentation has many roles which you can check out. In this tutorial, we will illustrate just one, the quit role which simply closes the application as the name implies.
Open your main JavaScript file and type the following:
We will simply add another submenu with a separator, then add a role.
//menu//

const electron = require ('electron')

const app = electron.app // electron module
const BrowserWindow = electron.BrowserWindow //enables UI
const Menu = electron.Menu // menu module

app.on('ready', _ => {
    new BrowserWindow()
    const template = [
        {
            label: 'Help',
            submenu: [{
                    label: `About US`,
                }, {
                    type: 'separator'
                },{
                    label: 'Quit',
                    role: 'quit'

                }]
        },
        {
            label: 'File',
            submenu: [{label:'New'},{label:'Open'},{label:'Save'}]

        },
        {
            label: 'Edit',

        },
        {
            label: 'View',

        },
        {
            label: 'Run',

        }
    ]
    const menu = Menu.buildFromTemplate (template)
    Menu.setApplicationMenu (menu)
})
Output:
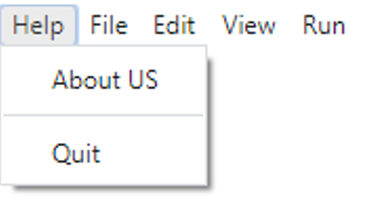
Notice that when you click on the quit submenu, the application closes.
Thanks for coding with me.
Advertisement
Advertisement