Home »
Node.js
Mobile Device Emulation Using Node.js and Puppeteer API
In this article, we are going to learn about the Mobile Device Emulation Using Node.js and Puppeteer API.
Submitted by Godwill Tetah, on June 02, 2019
In my last articles, I ended on how we can take screenshots using Node.js and puppeteer?
We saw the various options available for screen capture using node and puppeteer.
As we already know, Puppeteer is a Node library developed by Google and provides a high level API for developers.
Today, we will look at a very important function, which is Mobile device emulation using puppeteer.
Take Note! You should have Node.js and puppeteer installed in your PC.
With Node.js and puppeteer already up and running, let's get started.
*NB: If you don't yet have Node.js/ puppeteer installed in your PC, read the article: NODE & GOOGLE PUPPETEER API SERIES
Puppeteer enables us to view how our websites will look on different mobile, Mac and PC platforms.
It makes work very easy for web developers because they always look out on the dynamic nature of their websites...
Isn't it cool !!??
Indeed, puppeteer has made work easy for Developers out there.
Now, let's get started.
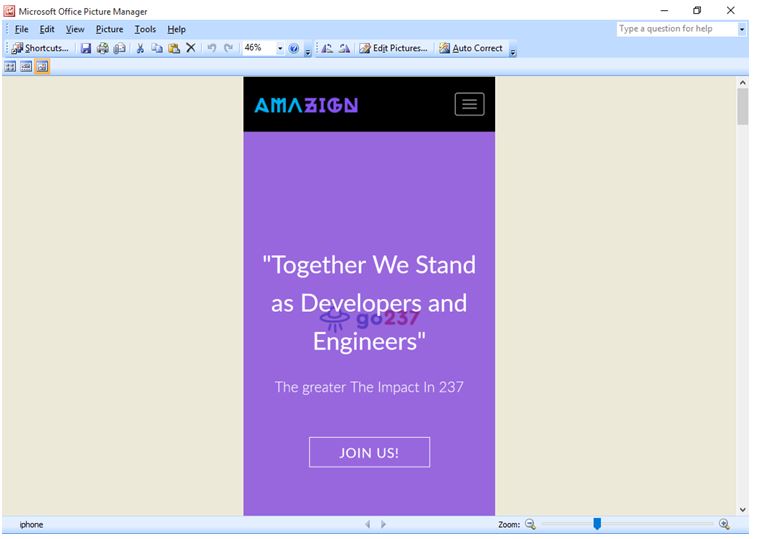
Below is the code that emulates the web page on an iPhone6 and takes a screenshot of the web page on an iPhone6 device and outputs the page title (produced by await page.title()) on the console when the code execution is complete!
You can get other mobile descriptions to emulate your desired devices.
Open a text editor and type the following code and save it with the file name app.js:
const puppeteer = require('puppeteer')
const devices = require('puppeteer/DeviceDescriptors');

(async () => {
  const browser = await puppeteer.launch()
  const page = await browser.newPage()
  await page.emulate(devices['iPhone 6'])
  await page.goto('file:///E:/HDD%2080%20GB%20DATA/CODING%20TUTORIALS%20AND%20CODES/go237.com/go237%20web/New%20design/index.html')
  await page.screenshot({path: 'iphone.png', fullPage: true})
  console.log(await page.title())
  await browser.close()
})()
NB: You can use any URL of your choice,
I this example, I used a webpage that was already downloaded to facilitate the tutorial but if it concerns a url on the www, internet connection is required to navigate to the website/web page.
The file should be saved in your default Node.js directory.
Run the code by initiating the file at the command prompt like a regular Node.js file.
Following our code, the title of the web page will be printed out on the command line console when everything is complete.
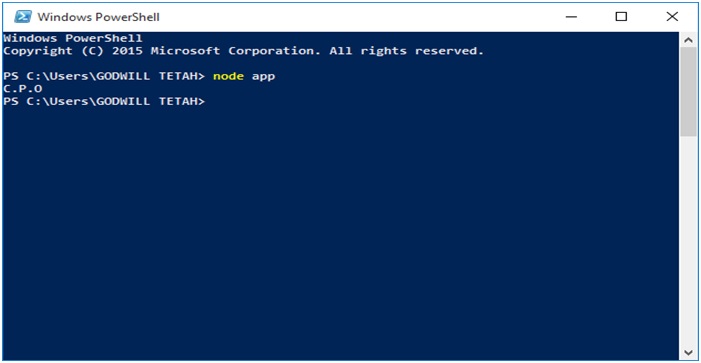
The Output image file is then stored in the default Node.js directory with name iphone.png
Output image file:
Advertisement
Advertisement