Home »
Python
Print ‘Hello World’ using Python and PyQT (first PyQT program)
Print ‘Hello World’ using Python and PyQT: This is the first Program that will simply print a text “Hello World” on interface. This article gives you slight introduction about modules and classes in PyQT; and you will design your first ever GUI purely through coding. In the next article, you will learn another simpler method to perform the same task. Understand each and every line of code, do as suggested; then do some experiments with the code to understand importance of each section. Feel free to ask for any kind of queries in comment section.
Submitted by Atul Anand, on November 30, 2017
Working Environment
I have already stated in my previous article, PyQT works excellently on all popular OS including Windows, Linux, Mac OS, and many others. You can get this software through two possible ways. Since its dual Licensed; you can either go for GPL (General Public License) that offers free software or choose its commercial licensed version to avail more tools and facilities.
Note: Different OS demands different installation processes. Surf Google. Stuck in trouble? Ask in comment section.
Modules and Major classes
There are 400+ classes and thousands of functions defined in more than 20 modules in a PyQT API. The QObject class holds the top stand in class hierarchy. There are few other classes which have their specific importance and they serve as base class for few other classes. Like, the QObject class serves as base class for all Qt objects. I am stating here few most popular modules with their one-line description.
| Modules |
Description |
| QtCore |
Contains basic Core non-GUI classes that are used by other modules. |
| QtGui |
Contains GUI components. |
| QtScript |
Contains classes for working on Qt Scripts. |
| QtDesigner |
Contains classes used for extending Qt-designer. |
| QtXml |
Contains classes for working with xml contents. |
| QtSql |
Contains classes for database handling using SQL. |
| QtWebKit |
Contains classes for working on HTML documents. |
| QtSvg |
Contains classes for displaying the contents of SVG (Support Vector Graphics) files. |
| QtMultimedia |
Contains classes used for low-level multimedia programming. |
| QtNetwork |
Contains classes for working on Network Program. |
The QObject and QPaintDevice class derives the QWidget class, which is the base class for all user interface objects. It further derives QDialog and QFrame classes. They have their own sub-class hierarchy. One main hierarchy is shown through this diagram:
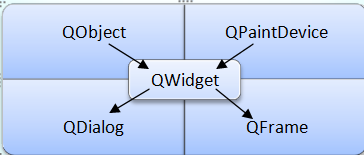
Tabular facts have been studied from "tutorialspoint". For further details about classifications and hierarchy system of classes and subclasses, refer to this link: https://www.tutorialspoint.com/pyqt/pyqt_major_classes.htm
Frequently used widgets
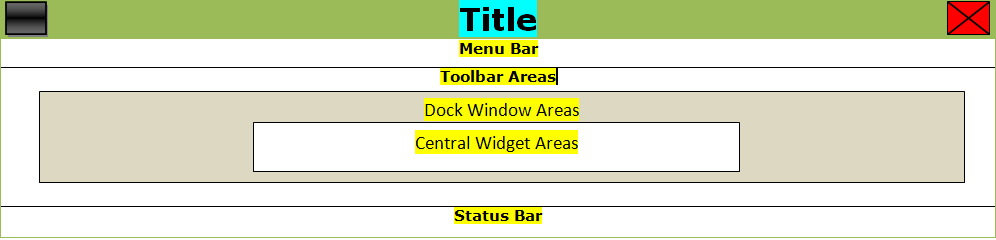
We can place widgets in two ways: either in the Main Window Area or in the Central Widget Area. The top level window is created by QMainWindow widget object. It can be well understood from this diagram shown below:
The first GUI program
Note: Please pay attention on the indentation of your code
The following program will simply pop up a small window containing text "Hello World" in it.
Source code 1
import sys
from PyQt4 import Qt
app = Qt.QApplication(sys.argv)
text = Qt.QLabel("Hello, World")
text.show()
app.exec_()
Output

Another elaborative way of doing this is given in the source code below. It will print a slightly better customized window layout:
Source code 2
import sys
from PyQt4 import QtGui
def hello_layout():
   app = QtGui.QApplication(sys.argv)
   text = QtGui.QWidget()
   lbl = QtGui.QLabel(w)
   lbl.setText("Hello World!")
   text.setGeometry(200,200,400,100)
   lbl.move(50,20)
   text.setWindowTitle("PyQt")
   text.show()
   sys.exit(app.exec_())
if __name__ == '__main__':
   hello_layout()
Output
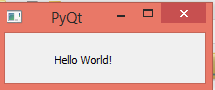
Note: Output image sizes are not set to scale.
Summary
At first, the required modules are imported. Then objects of required classes are instantiated using function invocation. To understand these programs, follow the OOPs procedure. Pay kind attention to the object and function linking using dot (.) operator. The purpose of each function can be easily understood by its function name, as python providers programmers a great readability. But, still if you face any problem in understanding the code, leave a query in comment section.
This was a very simple code to implement the basic appearance of GUI. Furthermore, in the next article we will follow another easy procedure. Stay connected. Keep Reading. Happy Learning!
Advertisement
Advertisement