Home »
VueJS Tutorial
Binding Classes in VueJS
Learn about the Binding Classes in VueJS.
Submitted by Venkatesan C, on March 09, 2022
It's common to manipulate the values of class attributes so that different kinds of styles and functionalities get assigned to an element. Since the class is an attribute, we can use v-bind to manipulate it.
How can we manipulate? By assigning an expression to it, an expression that can result in one or more classes gets attached to the class attribute in the form of a string. As we are going to see later, we can assign multiple classes to an element by using arrays and objects through expressions.
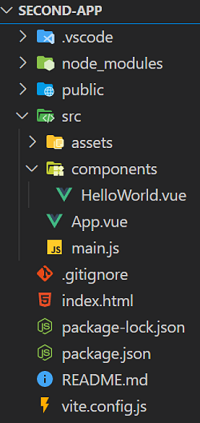
Let's look at an example by creating a Vue project created by Vite. Let's name it second-app (in fact this is the same project that's been created in the VueJS installation tutorial).
Here's the project structure:
Now delete everything inside the App.vue file and paste the below code. The below is simpler to understand the binding classes in the VueJs concept.
App.vue
<template>
  <h1 class="underline">1. This is heading one</h1>
  <h1 v-bind:class="color">2. This is heading two</h1>
  <h1 class="underline" v-bind:class="color">3. This is heading three</h1>
  <h1 v-bind:class="isGood && 'green'">4. This is heading four</h1>
  <h1 v-bind:class="isBad ? 'red' : 'green'">5. This is heading five</h1>
  <h1 v-bind:class="['red', 'green']">6. This is heading six</h1>
  <h1 v-bind:class="[ !isGood && 'green', !isBad ? 'red' : 'green']">
    7. This is heading seven
  </h1>
  <h1 :class="{ green: isGood }">8. This is heading eight</h1>
</template>

<script>
export default {
  name: "App",
  data() {
    return {
      isGood: true,
      isBad: false,
    };
  },
};
</script>

<style>
.underline {
  text-decoration: underline;
}

.green {
  color: green;
}

.red {
  color: red;
}
</style>
In the above code, we have
- Seven headings in the template tag,
- Two boolean properties in the data method and
- Three classes in the style tag.
Let's see each of the heading tags one by one,
Static Class
In the first heading tag, we have a static class of value "underline", which is declared in the style tag to have text-decoration: underline.
<h1 class="underline">1. This is heading one</h1>
This is a static class, which means it cannot be manipulated or tracked. This will result in displaying the first heading underlined.
Dynamic Class
In the second heading tag, we have bound the class attribute to a property named color.
This property is declared in the data method. Hence this is a dynamic class since the class attribute's value will change as the value of color changes.
<h1 v-bind:class="color">2. This is heading two</h1>
This will result in displaying the second heading in the green color.
Static and Dynamic Classes
It is possible to use both static and dynamic classes for an element. In the third heading tag, we have done that.
<h1 class="underline" v-bind:class="color">3. This is heading three</h1>
This will result in displaying the third heading tag in the underlined green color.
Expression in the class attribute
We can also use an expression, let's say a conditional expression to decide what classes have to be attached to an element. In the fourth and fifth heading, we have used conditional expressions.
<h1 v-bind:class="isGood && 'green'">4. This is heading four</h1>
In the above expression, if the isGood property results in a true value, then the class 'green' will be assigned to the class attribute. Else, the class attribute will get a value false assigned to it. Note that here a string false is assigned not a boolean value false. To avoid this unnecessary false assignment, we can use ternary expressions.
<h1 v-bind:class="isBad ? 'red' : 'green'">5. This is heading five</h1>
Since the fifth heading tag has a ternary expression assigned to it, a value of 'red' and 'green' gets assigned to the class attribute which will result in displaying the fifth heading 'red' and 'green' depending on the isBad value.
Here both the fourth and fifth headings get displayed in the 'green' color, as the value of isGood is true and isBad is false.
Binding classes using arrays
We can also assign multiple classes to the class attribute using arrays as follows.
<h1 v-bind:class="['red', 'underline']">6. This is heading six</h1>
In the sixth heading, since we assign an array with 'green' and 'underline' in it. This will result in displaying the sixth heading as an underlined red heading.
Arrays with conditional expressions
We can also control the values stored in the array by using conditional expressions within the array itself.
<h1 v-bind:class="[ !isGood && 'green', !isBad ? 'red' : 'green']">
7. This is heading seven
</h1>
The seventh heading has a list of conditional expressions assigned to the class attribute; this will result in displaying the heading in red color.
Binding classes using objects
We can also use objects to control the values that can get assigned to the class attribute. Here the key is the name of the class that has to be assigned, and value is the expression that decides whether it has to be added or not.
<h1 :class="{ green: isGood }">8. This is heading eight</h1>
The eighth heading has an object assigned to the class attribute. This will result in displaying the heading in the green color.
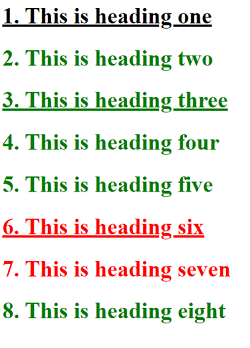
Let's loop at the final output,
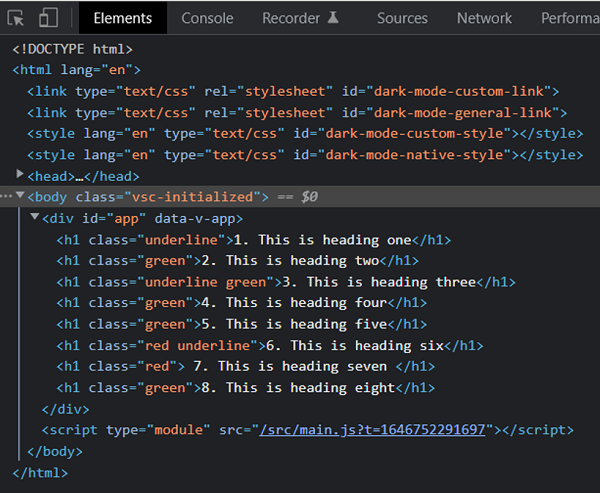
Inspecting the elements, shows us the values of the class attribute after the render. You can view this by the following shortcut Ctrl + Shift + I.
Advertisement
Advertisement