Home »
Android
How to Build Your First Android Application?
Build Your First Android Application: In this tutorial, we will learn How to Build Your First Android Application? This tutorial contains step by step process of developing the first application in Android with the output screenshots.
By Shamikh Faraz Last updated : June 06, 2023
Development process / steps for building first android application
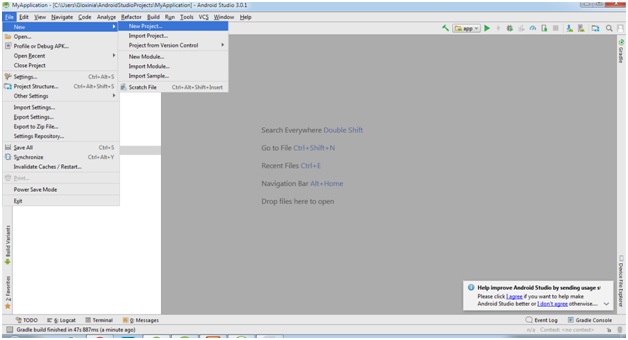
Step 1: Create new project
To create a new project, Click File → New → New Project
Step 2: Define project name and other information
In the 'Application Name', you can give your project name. Click Next.

Step 3: Select the device
Now you can select, device ( i.e. phone and tablet, wear, TV) for which you are designing your app. Click Next.
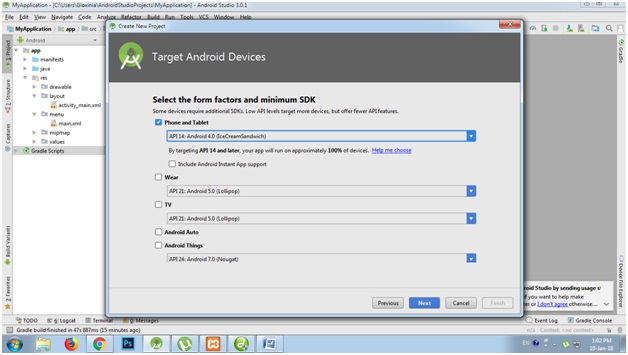
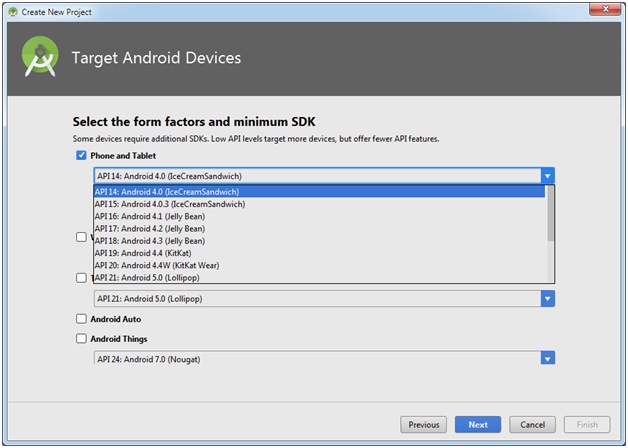
Step 4: Select android operating system
Also you have to select android operating version for your device. Click Next.
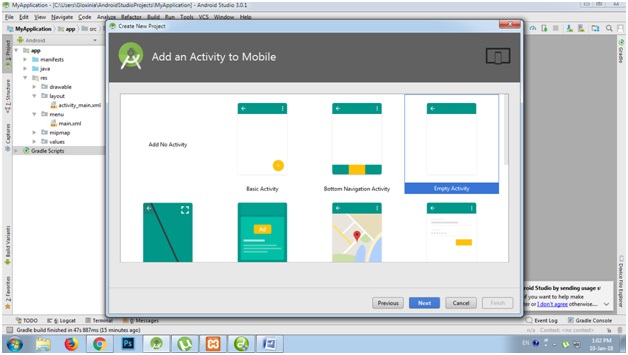
Step 5: Select activity (layout for app)
Here you can select activity (the layout for app). Click Next.
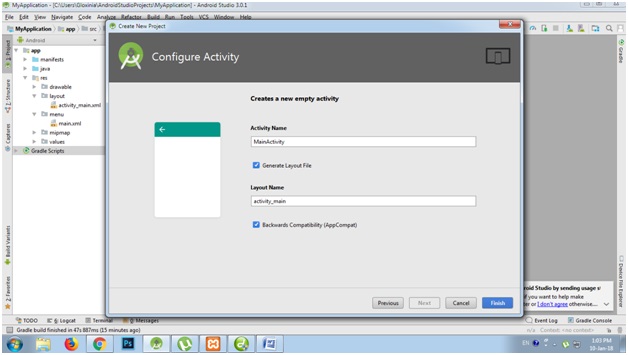
Step 6: Define activity name
Here you can give activity name, but generally we use 'Main Activity'. Click Next.
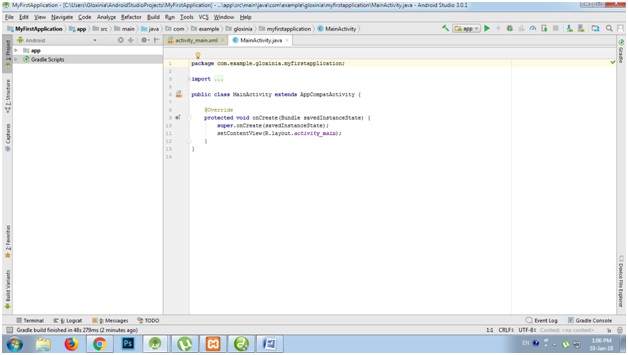
Step 7: Choose file(s) and write code
(1): After clicking finish your project window will show. There will be two files 'XML' and 'Java'. (See the code file after all these steps.)
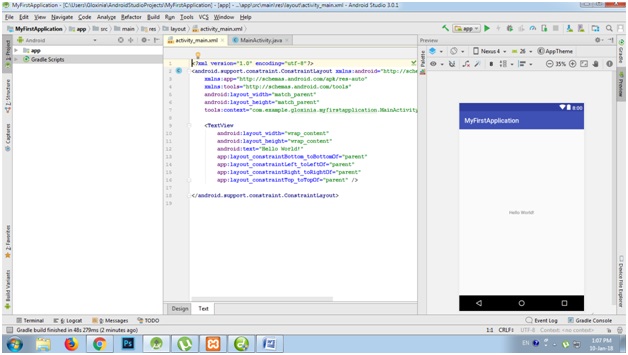
(2): When you click XML file, it will show XML coding phase of layout. You will have to write code for app layout. (See the code file after all these steps.)
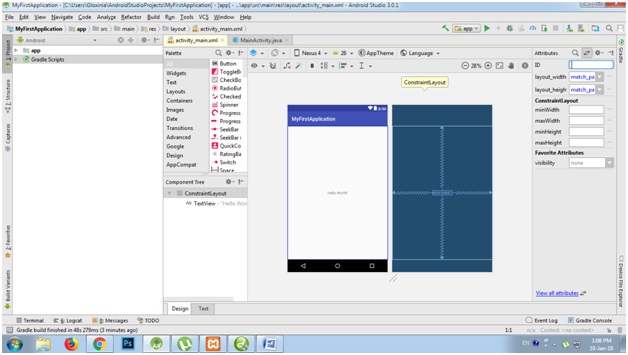
(3): If you click on 'Design'. Only design phase will show. Coding will hide.
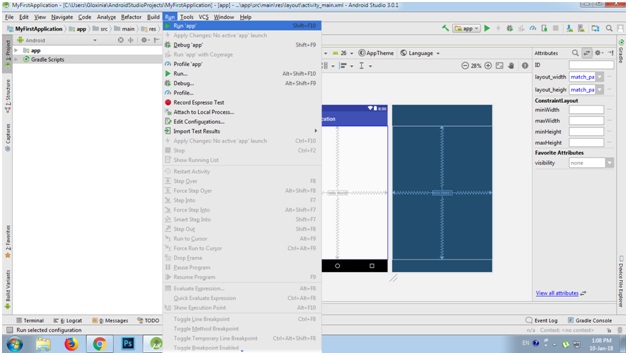
Step 8: Run the code
Go to 'Run' or Click on 'Run button' or you can use Shift+F10 for displaying the final output of your layout.
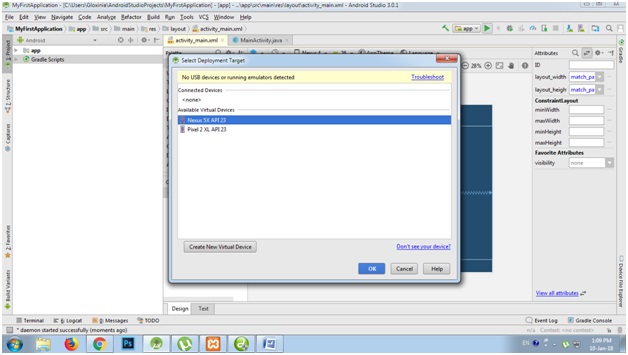
Step 9: Select the emulator
It is android virtual device list. Here you have to select your emulator i.e. which size of device you want to use for layout display. Select anyone of these and click 'OK'.
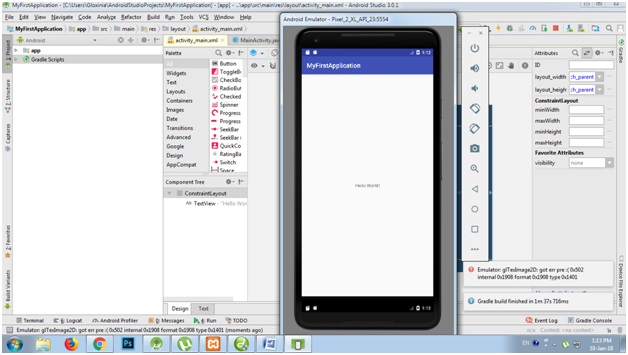
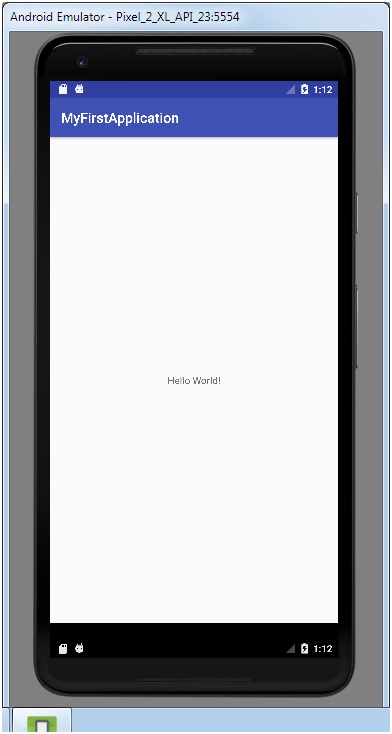
Step 10: The final step
Finally your Emulator runs, you can see your output.
First Android Application Source Code Files
File: MainActivity.java
package com.example.myapplication;

import androidx.appcompat.app.AppCompatActivity;

import android.os.Bundle;

public class MainActivity extends AppCompatActivity {

    @Override
    protected void onCreate(Bundle savedInstanceState) {
        super.onCreate(savedInstanceState);
        setContentView(R.layout.activity_main);
    }
}
File: actvity_main.xml
<?xml version="1.0" encoding="utf-8"?>
<androidx.constraintlayout.widget.ConstraintLayout xmlns:android="http://schemas.android.com/apk/res/android"
    xmlns:app="http://schemas.android.com/apk/res-auto"
    xmlns:tools="http://schemas.android.com/tools"
    android:layout_width="match_parent"
    android:layout_height="match_parent"
    tools:context=".MainActivity">

    <TextView
        android:layout_width="wrap_content"
        android:layout_height="wrap_content"
        android:text="Hello World!"
        app:layout_constraintBottom_toBottomOf="parent"
        app:layout_constraintEnd_toEndOf="parent"
        app:layout_constraintStart_toStartOf="parent"
        app:layout_constraintTop_toTopOf="parent" />

</androidx.constraintlayout.widget.ConstraintLayout>
File: AndroidManifest.xml
<?xml version="1.0" encoding="utf-8"?>
<manifest xmlns:android="http://schemas.android.com/apk/res/android"
    xmlns:tools="http://schemas.android.com/tools">

    <application
        android:allowBackup="true"
        android:dataExtractionRules="@xml/data_extraction_rules"
        android:fullBackupContent="@xml/backup_rules"
        android:icon="@mipmap/ic_launcher"
        android:label="@string/app_name"
        android:roundIcon="@mipmap/ic_launcher_round"
        android:supportsRtl="true"
        android:theme="@style/Theme.MyApplication"
        tools:targetApi="31">
        <activity
            android:name=".MainActivity"
            android:exported="true">
            <intent-filter>
                <action android:name="android.intent.action.MAIN" />

                <category android:name="android.intent.category.LAUNCHER" />
            </intent-filter>
        </activity>
    </application>

</manifest>
Output
The Emulator gives you the final display of your app
Advertisement
Advertisement