Home »
CSS
How to place text blocks over an image using CSS?
Text blocks over an image with CSS: In this tutorial, we will learn how to place text blocks over an image using CSS.
By Apurva Mathur Last updated : July 25, 2023
Text blocks over an image
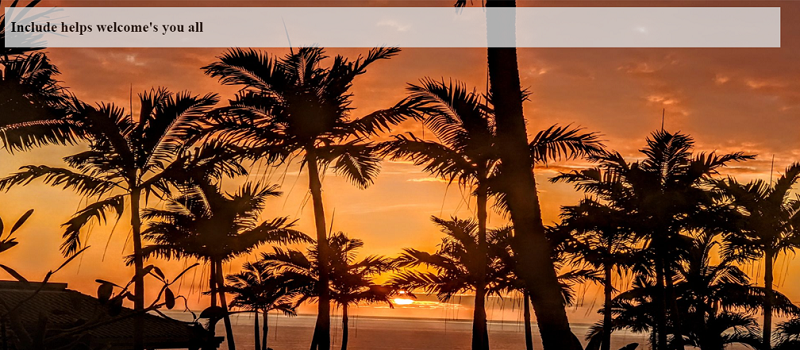
We may have seen on many websites that some text is written over the images for example:

Have you wondered how developers create this through CSS? In this article, we'll see how we can place any text block over an image using CSS.
Placing text blocks over an image using CSS
To place text blocks over an image, you have to use the position:absolute property to the text. The CSS position:absolute property is used to set the position of an element to its parent. If we use the absolute property then the positioning of the element will not depend on its siblings or other relative elements. Which will help our text block to display over the image not under or below the image? With this simple basic property like background color, opacity, margin property is used which can be modified according to your desire.
Example to place text blocks over an image using CSS
<!DOCTYPE html>
<html lang="en">
   <head>
      <meta charset="utf-8">
      <title>HTML</title>
   </head>
   <style>
      .text{
      position: absolute;
      top: 20px;
      left: 20px;
      right: 50px;
      padding-left: 10px;
      background-color: gainsboro;
      opacity: 0.8;
      }
      img {
      width: 100%;
      height: 600px;
      }
   </style>
   <body>
      <div class="img">
         <img src="https://www.industrialempathy.com/img/remote/ZiClJf-1920w.jpg" alt="">
         <div class="text">
            <h2> Include helps welcome's you all </h2>
         </div>
      </div>
   </body>
</html>
The output of the above example is:
Example Code Explanation
As discussed above the main property which is helping our text to display over the image is position:absolute property, this property is specifically applied to text, and using class as selector I've provided the styling, moreover I've taken two div and provided different classes to each other, this is done to uniquely identify the containers to style separately, rest each property can be neglected or can be changed according to your needs.
Tip: It is always considered a good habit to design each element using the class selector. As every element is exceptionally styled in this manner and the formation of code also looks high-quality.
CSS Examples »
Advertisement
Advertisement