Home »
Android
Map activity in Android Studio
In this article, we will learn how to use map activity and in Android Studio and initialize some user permissions for working on it?
Submitted by Manu Jemini, on March 13, 2018
A Map is an important thing to have in your app as it gives your user a perfect view of the location. The Google map can be implemented easily in android studio project because android studio gives a ready to use activity.
There are few things you have to do to reach this point, first make a new android studio project or open an existing one. In the root directory right-click on the folder and select the new activity and Google Maps Activity. After it gives a name to the activity and you are ready to go.
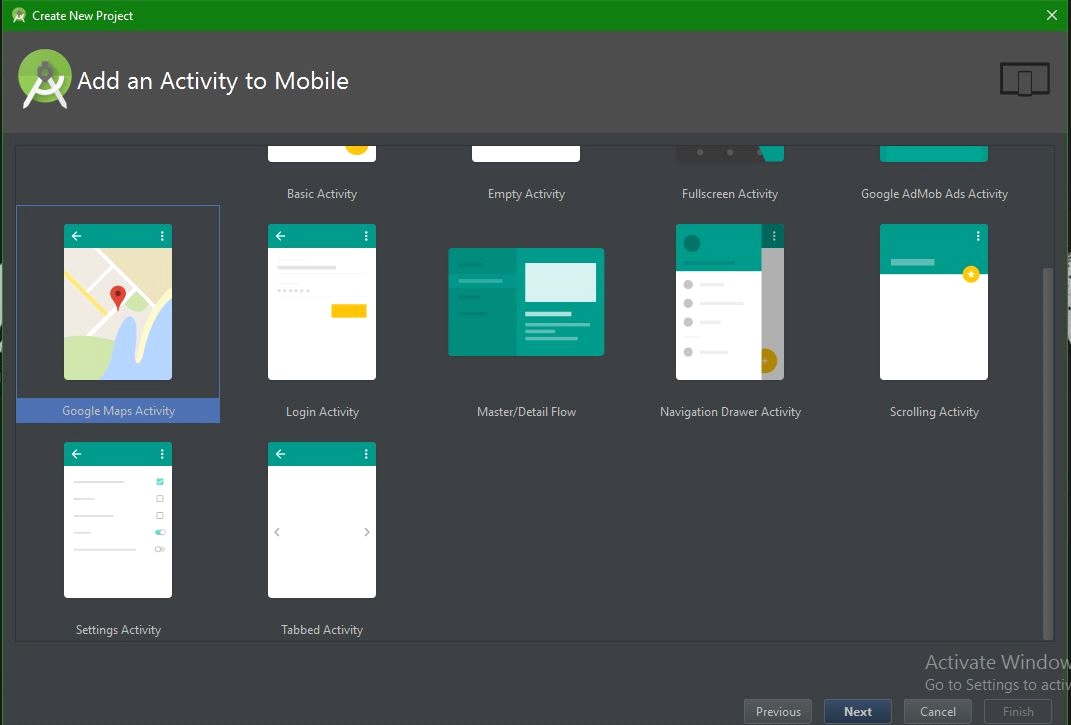
1) This pop-up window will come up when you will choose the option above. Here, select the Google Maps Activity and hit NEXT.
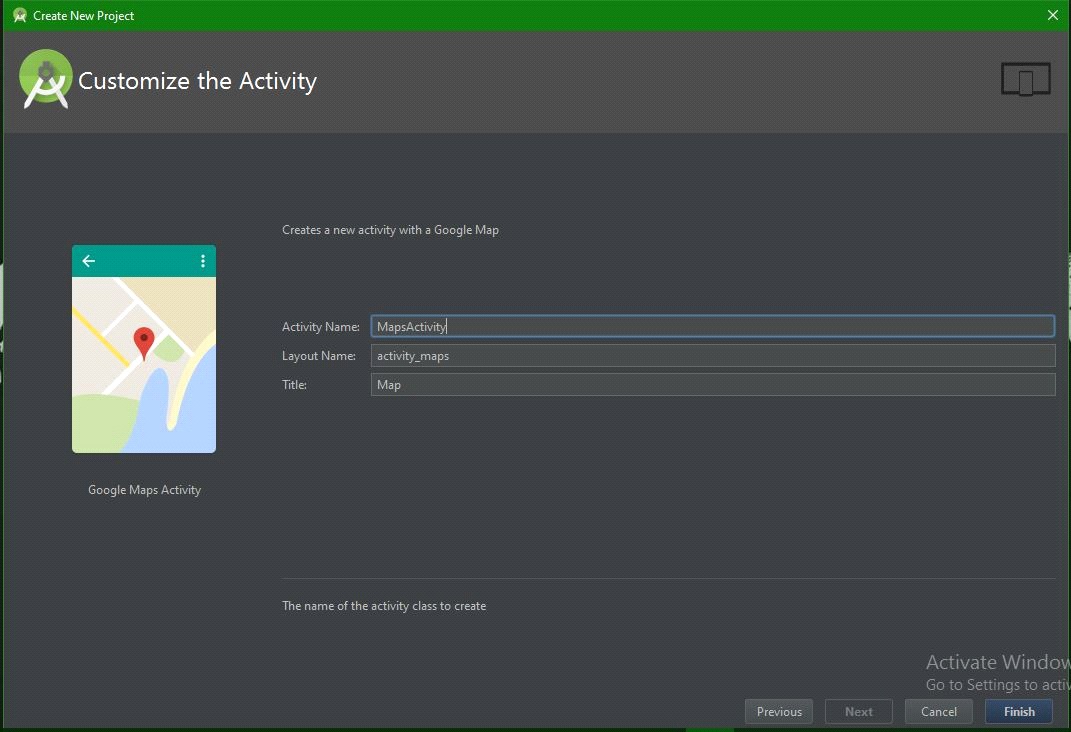
2) After clicking the Next button a window will pops-up and we have to give a name, here it is MainActvity. After you have done with it hit FINISH.
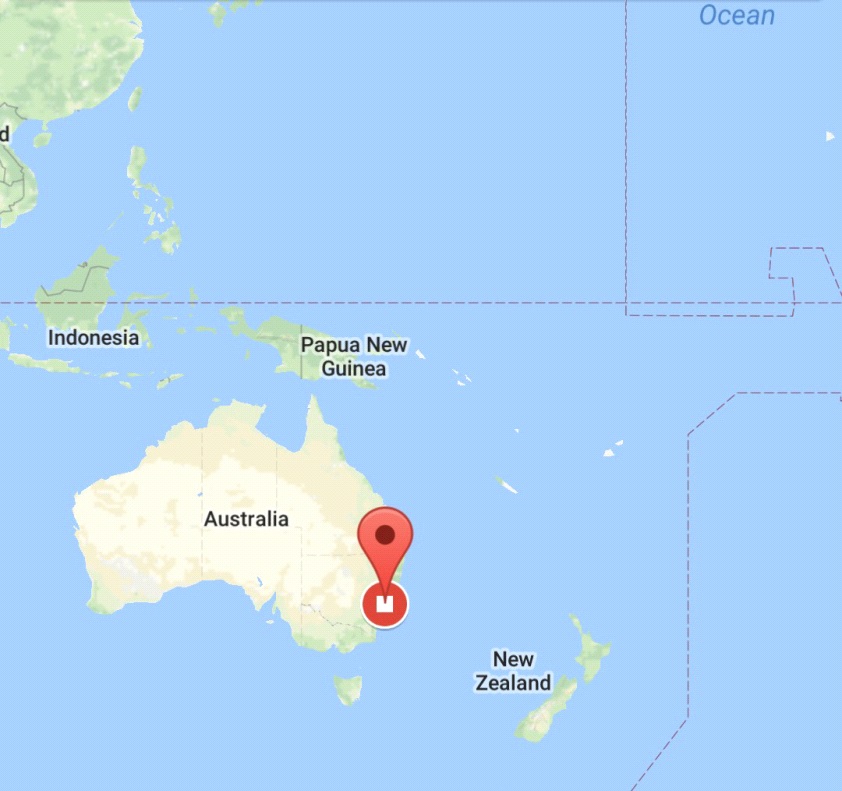
Now you are ready to launch the app, the code below is by default and you don't have to worry about the complications. The Output of this program is in the end, have a look.
1) Java file:
package com.example.hp.myapplication;

import android.support.v4.app.FragmentActivity;
import android.os.Bundle;

import com.google.android.gms.maps.CameraUpdateFactory;
import com.google.android.gms.maps.GoogleMap;
import com.google.android.gms.maps.OnMapReadyCallback;
import com.google.android.gms.maps.SupportMapFragment;
import com.google.android.gms.maps.model.LatLng;
import com.google.android.gms.maps.model.MarkerOptions;

public class MapsActivity extends FragmentActivity implements OnMapReadyCallback {

    private GoogleMap mMap;

    @Override
    protected void onCreate(Bundle savedInstanceState) {
        super.onCreate(savedInstanceState);
        setContentView(R.layout.activity_maps);
        // Obtain the SupportMapFragment and get notified when the map is ready to be used.
        SupportMapFragment mapFragment = (SupportMapFragment) getSupportFragmentManager()
                .findFragmentById(R.id.map);
        mapFragment.getMapAsync(this);
    }


    /**
     * Manipulates the map once available.
     * This callback is triggered when the map is ready to be used.
     * This is where we can add markers or lines, add listeners or move the camera. In this case,
     * we just add a marker near Sydney, Australia.
     * If Google Play services is not installed on the device, the user will be prompted to install
     * it inside the SupportMapFragment. This method will only be triggered once the user has
     * installed Google Play services and returned to the app.
     */
    @Override
    public void onMapReady(GoogleMap googleMap) {
        mMap = googleMap;

        // Add a marker in Sydney and move the camera
        LatLng sydney = new LatLng(-34, 151);
        mMap.addMarker(new MarkerOptions().position(sydney).title("Marker in Sydney"));
        mMap.moveCamera(CameraUpdateFactory.newLatLng(sydney));
    }
}
2) XML file:
<fragment xmlns:android="http://schemas.android.com/apk/res/android"
    xmlns:map="http://schemas.android.com/apk/res-auto"
    xmlns:tools="http://schemas.android.com/tools"
    android:id="@+id/map"
    android:name="com.google.android.gms.maps.SupportMapFragment"
    android:layout_width="match_parent"
    android:layout_height="match_parent"
    tools:context="com.example.hp.myapplication.MapsActivity" />
3) Android Manifest file:
<?xml version="1.0" encoding="utf-8"?>
<manifest xmlns:android="http://schemas.android.com/apk/res/android"
    package="com.example.hp.myapplication">

    <!--
         The ACCESS_COARSE/FINE_LOCATION permissions are not required to use
         Google Maps Android API v2, but you must specify either coarse or fine
         location permissions for the 'MyLocation' functionality.
    -->
    <uses-permission android:name="android.permission.ACCESS_FINE_LOCATION" />
    <uses-permission android:name="android.permission.ACCESS_COARSE_LOCATION" />
    <uses-permission android:name="android.permission.INTERNET" />
    <uses-permission android:name="android.permission.ACCESS_NETWORK_STATE" />
    <uses-permission android:name="com.google.android.providers.gsf.permission.READ_GSERVICES" />
    <uses-permission android:name="android.permission.WRITE_EXTERNAL_STORAGE" />

    <application
        android:allowBackup="true"
        android:icon="@mipmap/ic_launcher"
        android:label="@string/app_name"
        android:supportsRtl="true"
        android:theme="@style/AppTheme">

        <!--
             The API key for Google Maps-based APIs is defined as a string resource.
             (See the file "res/values/google_maps_api.xml").
             Note that the API key is linked to the encryption key used to sign the APK.
             You need a different API key for each encryption key, including the release key that is used to
             sign the APK for publishing.
             You can define the keys for the debug and release targets in src/debug/ and src/release/.
        -->
        <meta-data
            android:name="com.google.android.geo.API_KEY"
            android:value="@string/AIzaSyAXhBdyKxUo_cb-EkSgWJQTdqR0QjLcqes" />

        <activity
            android:name=".MapsActivity"
            android:label="@string/title_activity_maps">
            <intent-filter>
                <action android:name="android.intent.action.MAIN" />

                <category android:name="android.intent.category.LAUNCHER" />
            </intent-filter>
        </activity>
    </application>

</manifest>
Output
Advertisement
Advertisement