Home »
Electron JS
Introduction to Electron JS
Electron JS | Introduction: Here, we are going to learn what is Electron JS and how to set up or get started with Electron JS?
Submitted by Godwill Tetah, on June 15, 2020
To better understand this article, you should have some basic knowledge of vanilla JavaScript and/or Node.Js.
Note: Ensure you have Node.Js installed before proceeding with the environment set up for Electron JS.
What is Electron JS?
Electron JS (electronjs.org) is an open-source framework that enables the use of web technologies (HTML, CSS, and JavaScript) to create native desktop applications or software for Windows, Mac, and Linux platforms.
It was previously called native shell and it is owned by GitHub.
Electron JS uses web pages as its graphical user interface. Electron JS is very important because it solves the following progress,
- It saves the time to learn a different programming language out of JavaScript stack like C# or Java to build native desktop applications.
- Electron JS applications also have access to native platform features like accessing the file system, creating a native menu, global shortcuts, and is equally offline by default.
Just like a Node.Js app, Electron JS apps use package.json file as a starting point when development is concerned.
Examples of software built with Electron JS framework include: VS code, atom, and postman.
Getting Started
To get started with the Electron JS, open a command line to your project's folder or directory and run the following command: npm install electron - -save-dev

This command will create a node_modules folder in your project's directory.
Wait for a while as it installs successfully!. Make sure you have an internet connection when executing the command.
After successful installation, edit your package.json file and set it up as seen below;
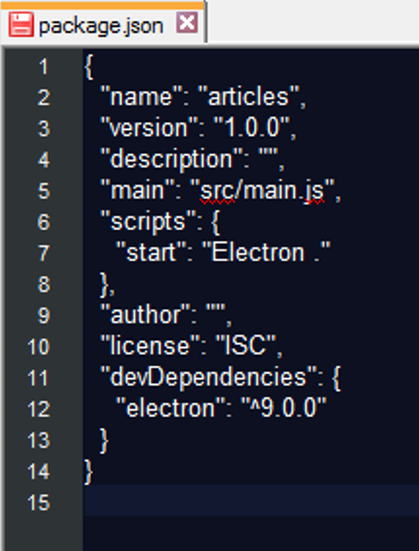
- If you don't find a package.json file in your project's directory, run the command npm init in that same directory.
- From the package.json, notice the main value and the start value which represents the source code file and the start command (Electron .) respectively.
- Also notice we decided to put the main file in the src folder just for a clean folder structure.
- Finally, open that same directory in a command-line terminal and run the command npm install to install all dependencies. This command also requires an internet connection.
So that's it friends. We're now ready to run a demo code to ensure everything worked.
const electron = require ('electron')

const app = electron.app // electron module
const BrowserWindow = electron.BrowserWindow //enables UI
let mainWindow
app.on ('ready', _ => {
    mainWindow = new BrowserWindow({
        height : 400,
        width : 400
    })

    mainWindow.loadURL (`file://${__dirname}/index.html`)

    mainWindow.on ('closed', _ => { //detect if window is closed.
        console.log ('closed!')
        mainWindow = null
    })

})
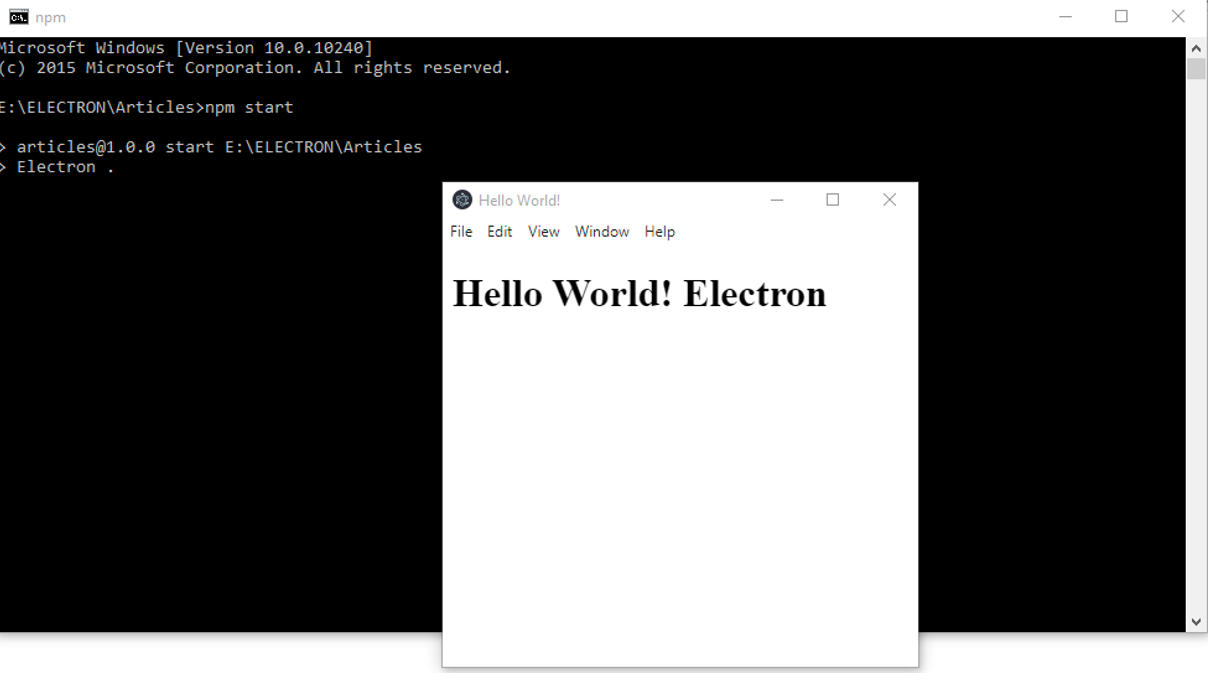
- Write a simple index.html file and save it in the src folder.
- Open the directory in a command-line terminal, then run the code npm start
- Finally, take a cup of coffee and watch the electron magic. Ha Ha Ha!
Advertisement
Advertisement