Home »
Ruby Tutorial
Ruby Installation Guide for Mac & Windows
By IncludeHelp Last updated : November 16, 2024
Installation of Ruby on Mac OS
Ruby is already included in default macOS installation but it won't be the latest version. In the following steps, we are setting up Ruby Programming Environment using Homebrew. You will have to use the Terminal Application provided macOS.
Step 1
Install Xcode(An IDE) Command line tool. Though it is not required for writing Ruby programs, Ruby and some of its components will depend upon Xcode's Command Line Tools package. Execute the command given below in the Terminal and these components will be downloaded and installed,
$ xcode-select –install
A prompt will appear to start the installation. Accept the software license and then tools will be downloaded and installed automatically.
Step 2
Install and Set up Homebrew. After installing Xcode, you are ready to install Homebrew (It is a package manager). We will use Homebrew to install the latest version of Ruby and configure our system to use this latest version. Type the following command in the Terminal to install Homebrew.
/usr/bin/ruby -e
$(curl-fsSLhttps://raw.githubusercontent.com/Homebrew/install/master/install)
The script which is downloaded by curl will be executed by default Ruby interpreter. The homebrew installation process will be started. The password prompt will appear. Return to the Terminal by pressing 'Return' key once you've entered your password.
Press y for Yes, whenever you are required to confirm the installation process. After the installation of Homebrew, we will put the directory Homebrew uses to store its executable files at the front of the PATH environment variables.
Use the nano text editor to create the bash_profile file by typing the following command:
$ nano ~/.bash_profile
Now add Homebrew's executable directory in front of the PATH
export PATH=/usr/local/bin:$PATH
To save the changes, use ctrl+O. A prompt will appear, press the Return key then press ctrl+X to exit the editor.
Now activate these changes by typing,
$ source ~/.bash_profile
To verify the brew set up, execute the command,
$ brew doctor
You will see this in your terminal,
"Your system is ready to use brew."
Step 3
Installing Ruby. In Homebrew, find packages related to Ruby by executing the following command,
$ brew search ruby
You will find a variety of options but don't get confused, just ask brew to install ruby by typing.
$ brew install ruby
Homebrew will install many dependencies and ultimately install and download Ruby.
To check the version installed, type:
$ ruby -v
Installation of Ruby on Windows OS
Follow the steps mentioned below for setting up Ruby Environment on your Windows PC,
Step 1: Download the zipped installer for Ruby Version 2.5.1 from the link provided https://rubyinstaller.org/downloads/.
Step 2: You will get a zipped file, unpack it into a new directory or folder.
Step 3: Now, Double Click on Ruby2.5.1.exe file. The installer window will appear.
Step 4: Click on the 'Next' and go through the documentation listed.
Step 4: Keep Clicking on 'Next' until the installation process is not completed.
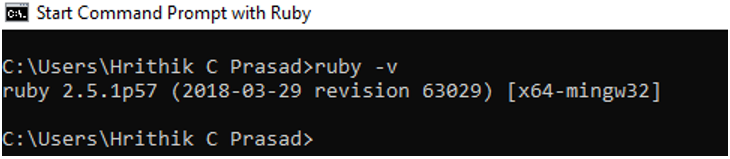
Step 5: If you want to make sure that Ruby is working fine, then proceed with checking the version by typing '-v' in the Command Prompt with Ruby.
Writing First Ruby Program
Now open Notepad, write a ruby code and save it with ".rb" extension
x = 190

if x > 2
	puts "x is greater than 2"
else
	puts "I can't guess the number"
end
Run the code through Ruby Command Prompt by writing "Ruby <program_name>.rb" in the following way, you will get the output in the Command Prompt.
x is greater than 2
Interactive Ruby (IRB)
- As the word Interactive suggests, Interactive Ruby is inclined towards creating a more user-friendly environment through an Interactive Command line argument. Interactive Ruby was designed by Keiju Ishitsuka.
- It is a type of tool which is used to implement the Ruby expressions read from the conventional input. Ruby is an Object-Oriented Scripting language and Read-Eval-Print-Loop(REPL) programming in ruby is carried out through Interactive Ruby.
- The commands are executed with an immediate response. Job control, line editing capabilities and command history are supported by IRB.
-
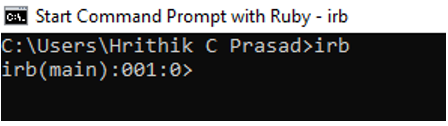
IRB can be invoked through typing irb on the shell or on the command prompt in the following way:
You can quit Interactive Ruby anytime by typing "exit" or "quit" on the command prompt as shown below:
irb(main):001:0> exit
    or
irb(main):001:0> quit
Syntax
irb.rb [options] [programfile] [arguments]
Here is the list of Command-line options which you may need while working on Interactive Ruby Shell.
| Serial Number | Option | Description |
| 1 | v, --version | Used for printing the version of irb. |
| 2 | -f | Used for Supressing read of ~/.irbrc |
| 3 | -m | Bash Calculator(bc) mode. It loads math, fraction or matrix are available. |
| 4 | -d | Used for setting $DEBUG to true(same as 'ruby -d') |
| 5 | -l path | Used for Specifying $LOAD_PATH directory |
| 6 | -r load-module | Functioning is same as 'ruby -r' |
| 7 | -U | Functioning is same as 'ruby -U' |
| 8 | -E enc | Functioning is same as 'ruby -E' |
| 9 | -w | Functioning is same as 'ruby -w' |
| 10 | -W[level=2] | Functioning is same as 'ruby -W' |
| 11 | --inspect | Use this option for output(default expect for bc mode) |
| 12 | --noninspect | Don't use this option for output. |
| 13 | --readline | Use readline extension module. |
| 14 | --prompt prompt-mode
--prompt-mode prompt-mode | Used for switching prompt mode. Pre-defined prompt modes are 'default', 'simple', 'xmp' and 'inf-ruby' |
| 15 | --inf-ruby-mode | Use prompt appropriate for inf-ruby-mode on emacs. Suppresses--readline. |
| 16 | --simple-prompt | It is a simple prompt mode |
| 17 | --noprompt | No prompt mode. |
| 18 | --tracer | It is used for displaying each execution of commands. |
| 19 | --back-trace-limit n | Its default value is 16 and used for displaying back trace top n and tail n. |
| 20 | --irb_debug n | It sets internal debug level to n(not for wide use) |
IRB can be used for evaluating a variety of expressions. You can go through the example given below for a better understanding of how Interactive Ruby evaluates expressions.
    irb(main):001:0> 120*78
    =>9360

    irb(main):002:0> 5-4
    =>1

    irb(main):003:0> 70/10
    =>7
There may be chances when you need the following lifesaving ruby terminal commands to pop out from the problem in which you are stuck:
- CTRL+c: It is used for interrupting the current process. If you are stuck in an endless or infinite loop then use this command in the terminal.
- CTRL+d: It is used for ending the IRB session and it takes you back into your terminal shell at the same time.
Advertisement
Advertisement