Home »
Machine Learning/Artificial Intelligence
Getting Started with Python Spyder: Installation and GUI Explanation
In this tutorial, we will learn about the Python Spyder, which is a Scientific python development environment, its installation and features of GUI.
By Raunak Goswami Last updated : April 16, 2023
How to Install Anaconda Distribution?
The Anaconda Distribution can be downloaded from the link Anaconda Distribution (for Windows users only).
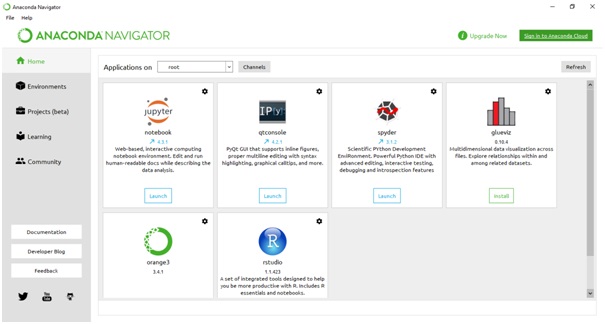
The installation is pretty simple just keep on clicking next and agree to terms and conditions. So, the reason for installing Anaconda is that it comes with a lot of preinstalled packages and Spyder is one of them. After installing the software just click on the anaconda icon on the desktop or go to the search option in windows 10 and type in anaconda navigator, for the Ubuntu users you can install anaconda using the terminal. As you open the navigator you will see the anaconda GUI which looks like this:
Spyder GUI Explanation
Launching Spyder GUI
To launch Spyder just click on the "launch" button. Below the Spyder and a new Spyder GUI will be opened in a separate window:
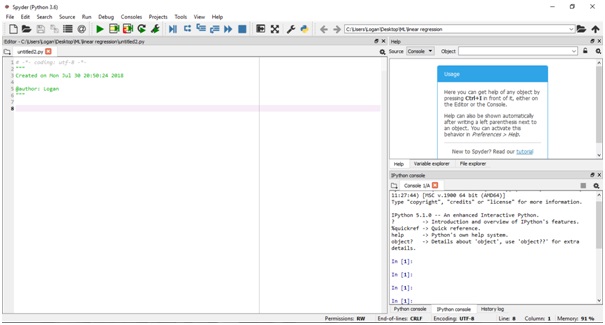
Screen 1
As you can see by default a new .py file named untitled2.py has been created. Untitled2 is the name of the file in which you will be writing your python code.
Here, I would be highlighting some of the basic features that important features and would be explaining them to you:
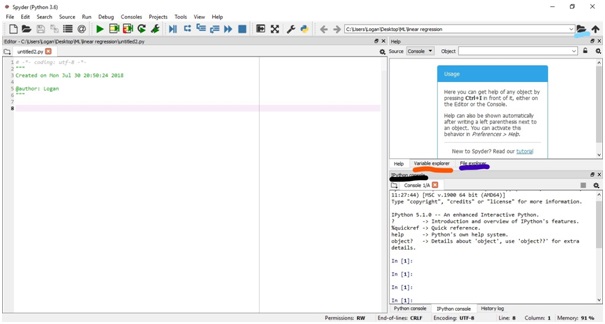
Screen 2
The portion marked in sky blue is used to set the directory of the file to be opened, in the previous article (Linear Regression in Machine Learning) I had mentioned in my code that I have stored the source code and .csv file in the same folder so after you save those 2 files in the same folder you can just go to this set directory option and select the folder in which you have stored the two files.
The portion marked in orange is the variable explorer this basically shows us the info about all the variables that we have created, after selecting your code using ctrlA and compiling your code using shift-enter just click on this option you will see the following:
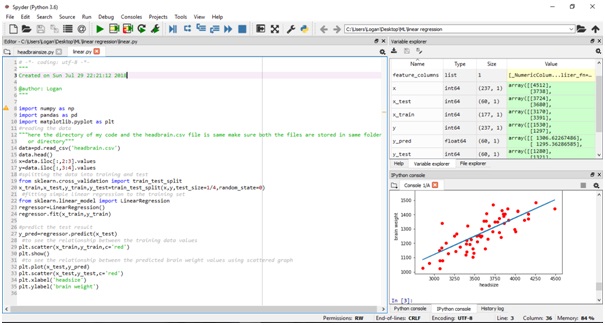
Screen 3
On the upper right of this screen you will see a box containing some names below the name column such as x_test, x_train etc these are the variables I have used and below the type column, you’ll see their datatype. As you move further right you can see size as well as the values stored.
As you go back to screenshot-2 you will see another portion marked in dark blue. The area marked is known as the file explorer and the main purpose of the file explorer is to select the files and load it on your Spyder. It also allows you to have a glimpse of the files present in the particular directory that you have selected.
And at last but not the least you’ll see the IPython console option marked with black ink in screenshot-2. IPython is basically a command shell for interactive computing in multiple programming languages, originally developed for the Python programming language, that offers introspection, rich media, shell syntax, tab completion, and history.
These are some of the basic features that Spyder offers, however, there are my more just install Anaconda see for yourself.
Advertisement
Advertisement