Home »
Android
How to Create Linear Orientation Layout of an Android App?
Set Linear Orientation Layout of an Android App: In this tutorial, we will learn about the step-by-step guide to create a linear orientation layout of an App in Android Studio.
By Manu Jemini Last updated : June 08, 2023
In our app, the view which user sees is called layout in android. Layout has different types of structure for various different purposes. All our Images, Buttons and Edit-Texts present in this part of your app. In your Java file you start to manipulate the layout.
Create Linear Orientation Layout of an App in Android Studio
The following are the steps to create linear orientation layout of an app in android studio:
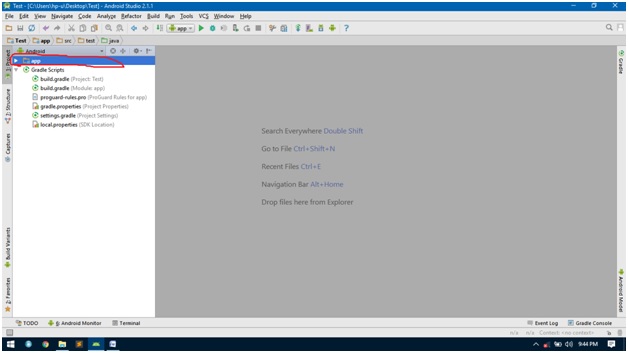
Step 1: Open your project or create a new one then open the directory project → app.
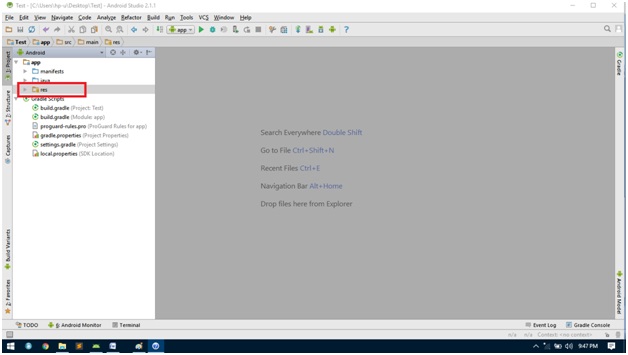
Step 2: After opening the app directory, open the directory project → app → res.
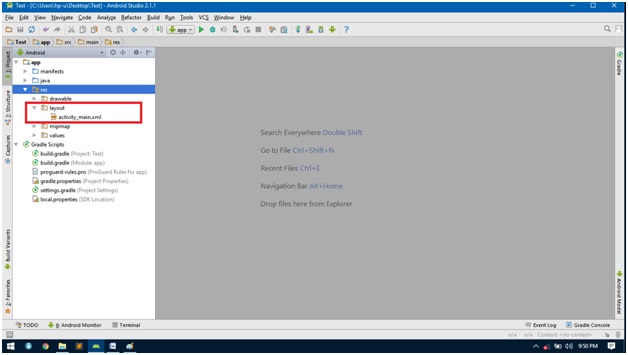
Step 3: Then, open the layout folder project → app → res → layout.
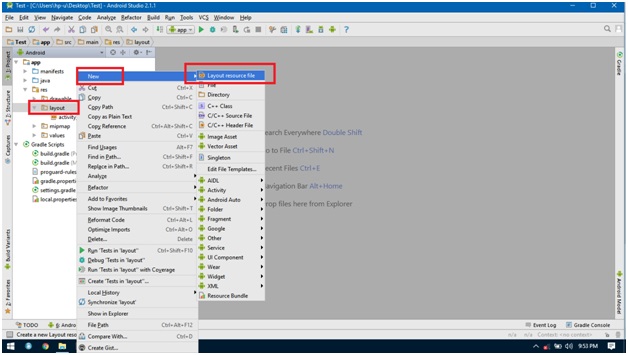
Step 4: This is your Layout folder; here you can see all of your layout files. To make a new layout, right click on the folder and select new → layout resource file.
Step 5: After clicking on that, a new window will pop-up, asking for the information about the layout. For now just fill the name and press ok.

Step 6: Your layout file will automatically opens up and you are ready to make your app.

Advertisement
Advertisement