Home »
Android
ImageView in Android with Example
Android | ImageView: In this tutorial, we will learn about ImageView with the help of an example, and how to use ImageView with user-defined images.
By Manu Jemini Last updated : June 08, 2023
What is ImageView in Android?
ImageView is the necessity in app development. ImageView is the part of the view where we can show our own image, that image-data can come from anywhere like a database, from the server, an API or we can also store it locally.
Android ImageView Example
In this example, we use the image-data from the local storage and it is also known as drawable. It is a directory in your project where we keep all our static images.
- The first step is to make or open an Android project.
- The second step is to create your new layout file or open an old one.
- The third step is to add an image view to your layout.
- The fourth step is to link the image view with the image file or image data in your drawable folder.
- The fifth step is to give height and width to your ImageView.
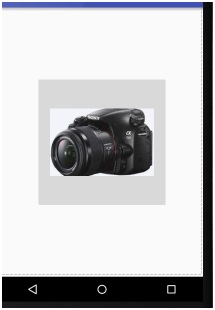
Your java-file need not have any changes. After everything in place, this will the result.
Image using as the image source.
android:src="@drawable/dslr"
Java file
package com.example.hp_u.my_contact;

        import android.support.v7.app.AppCompatActivity;
        import android.os.Bundle;

public class ImageView extends AppCompatActivity {

    @Override
    protected void onCreate(Bundle savedInstanceState) {
        super.onCreate(savedInstanceState);
        setContentView(R.layout.activity_image_view);
    }
}
Layout file
<?xml version="1.0" encoding="utf-8"?>
<RelativeLayout xmlns:android="http://schemas.android.com/apk/res/android"
    xmlns:tools="http://schemas.android.com/tools"
    android:layout_width="match_parent"
    android:layout_height="match_parent"
    android:paddingBottom="@dimen/activity_vertical_margin"
    android:paddingLeft="@dimen/activity_horizontal_margin"
    android:paddingRight="@dimen/activity_horizontal_margin"
    android:paddingTop="@dimen/activity_vertical_margin"
    tools:context="com.example.hp_u.my_contact.ImageView">
    <ImageButton
        android:layout_width="250dp"
        android:layout_height="250dp"
        android:id="@+id/imageButton3"
        android:layout_gravity="center"
        android:src="@drawable/dslr"
        android:layout_centerVertical="true"
        android:layout_centerHorizontal="true" />
</RelativeLayout>
Manifest file
<?xml version="1.0" encoding="utf-8"?>
<manifest xmlns:android="http://schemas.android.com/apk/res/android"
    package="com.example.hp_u.my_contact">

    <uses-feature android:name="android.hardware.camera2" />

    <uses-permission android:name="android.permission.READ_EXTERNAL_STORAGE" />
    <uses-permission android:name="android.permission.WRITE_EXTERNAL_STORAGE" />
    <uses-permission android:name="android.permission.CAMERA" />
    <uses-permission android:name="android.permission.FLASHLIGHT" />

    <application
        android:allowBackup="true"
        android:icon="@mipmap/ic_launcher"
        android:label="@string/app_name"
        android:supportsRtl="true"
        android:theme="@style/AppTheme">
        <activity android:name=".MainActivity">
            <intent-filter>
                <action android:name="android.intent.action.MAIN" />

                <category android:name="android.intent.category.LAUNCHER" />
            </intent-filter>
        </activity>
        <activity
            android:name=".ListContact"
            android:label="@string/title_activity_list_contact" />
        <activity android:name=".ImageView"></activity>
    </application>

</manifest>
Output
Advertisement
Advertisement