Home »
Java programming language
Java AWT Button
Java | AWT Button: In this tutorial, we will look at one of the Java AWT components, the AWT Button with example.
Submitted by Saranjay Kumar, on April 29, 2020
The Button class is used to implement a GUI push button. It has a label and generates an event, whenever it is clicked. As mentioned in previous sections, it extends the Component class and implements the Accessible interface.
Whenever a button is pushed, it generates an instance of the ActionEvent class. To perform some functionality on a button click, we need an ActionListener. Any class implementing the ActionListener interface can be used to handle a button click. We will study in detail how to handle events in later sections.
Consider the following code -
import java.awt.*;

public class CreateButton{

     CreateButton()
     {
        Frame f = new Frame();
        Button b1 = new Button("Button 1");
        Button b2 = new Button("B2");
        Button b3 = new Button();

        b1.setBounds(50,50,100,50);
        b2.setBounds(50,100,100,50);
        b3.setBounds(150,50,100,100);

        f.setLayout(null);
        f.setSize(300,300);
        f.setVisible(true);

        f.add(b1);
        f.add(b2);
        f.add(b3);

        if(b1.getLabel() == "Button 1")
        b3.setLabel("B3");
     }


    public static void main(String []args){
        CreateButton b = new CreateButton();
    }
}
Output
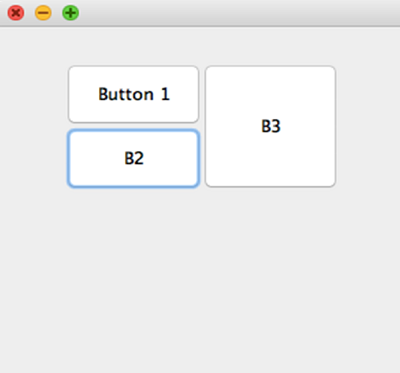
As seen in the code, we can initialize a Button object with or without a label. Buttons b1 and b2 have been initialized with the text "Button 1" and "B2" respectively. We have used the default constructor while creating object b3. That is why the button is initialized without any text on it.
The setBounds() method of the button is used to set its location and size on the frame. Its signature is
public void setBounds(int x, int y, int width, int height).
x here is the number of pixels from the left and y is the number of pixels from the top. Thus, x and y are used to decide the position of the button on the frame. The next two parameters, int width, and int height are used to set the size of the button, in pixels.
The getLabel() method is used to read the label of the button it is called on. It returns the text of the button label as a String. Its signature is
public String getLabel().
The setLabel() method that is called on button b3 in the code, is used to rename/set the label of a button. Initially, b3 was created with an empty string as the label. Its label is changed to "B3" using the setLabel() method. Its signature is
public void setLabel(String text)
All the buttons are added in the frame using the add method of the Frame class (as discussed in previous sections).
Advertisement
Advertisement