Home »
Android with Kotlin
Develop your first App with Kotlin | Android with Kotlin
By IncludeHelp Last updated : December 04, 2024
In the previous article, we learned how to setup Kotlin in the android studio? Now moving to journey ahead we are going to develop our first app with Kotlin. It is the basic app, but it will let you know the structure of the program.
Develop your first App with Kotlin
After creating a new Kotlin project, few files will be created in Java and layout folder. The java folder contains the kotlin (.kt) files and layout folder contains the .xml files. If you are still confused, just head over to the previous article and revise how to create a Kotlin project?
Code Files
Let's have a look at those files:
MainActivity.kt
package com.onedreamers.myapplication

import android.support.v7.app.AppCompatActivity
import android.os.Bundle

class MainActivity : AppCompatActivity() {

    override fun onCreate(savedInstanceState: Bundle?) {
        super.onCreate(savedInstanceState)
        setContentView(R.layout.activity_main)
    }
}
This is kotlin file which contains logics and functionality of our MainActivity.
activity_main.xml
<?xml version="1.0" encoding="utf-8"?>
<android.support.constraint.ConstraintLayout xmlns:android="http://schemas.android.com/apk/res/android"
    xmlns:app="http://schemas.android.com/apk/res-auto"
    xmlns:tools="http://schemas.android.com/tools"
    android:layout_width="match_parent"
    android:layout_height="match_parent"
    tools:context="com.onedreamers.myapplication.MainActivity">

    <TextView
        android:layout_width="wrap_content"
        android:layout_height="wrap_content"
        android:text="Hello World!"
        app:layout_constraintBottom_toBottomOf="parent"
        app:layout_constraintLeft_toLeftOf="parent"
        app:layout_constraintRight_toRightOf="parent"
        app:layout_constraintTop_toTopOf="parent" />

</android.support.constraint.ConstraintLayout>
This is layout file which contains code for the design of our activity. Here we have a TextView that will show "Hello world" on the screen. This will remain same either we use java or kotlin as source language.
Build.gradle
apply plugin: 'com.android.application'

apply plugin: 'kotlin-android'

apply plugin: 'kotlin-android-extensions'

android {
    compileSdkVersion 26
    defaultConfig {
        applicationId "com.onedreamers.myapplication"
        minSdkVersion 21
        targetSdkVersion 26
        versionCode 1
        versionName "1.0"
        testInstrumentationRunner "android.support.test.runner.AndroidJUnitRunner"
    }
    buildTypes {
        release {
            minifyEnabled false
            proguardFiles getDefaultProguardFile('proguard-android.txt'), 'proguard-rules.pro'
        }
    }
}

dependencies {
    implementation fileTree(dir: 'libs', include: ['*.jar'])
    implementation "org.jetbrains.kotlin:kotlin-stdlib-jre7:$kotlin_version"
    implementation 'com.android.support:appcompat-v7:26.1.0'
    implementation 'com.android.support.constraint:constraint-layout:1.0.2'
    implementation 'com.android.support:support-v4:26.1.0'
    testImplementation 'junit:junit:4.12'
    androidTestImplementation 'com.android.support.test:runner:1.0.1'
    androidTestImplementation 'com.android.support.test.espresso:espresso-core:3.0.1'

}
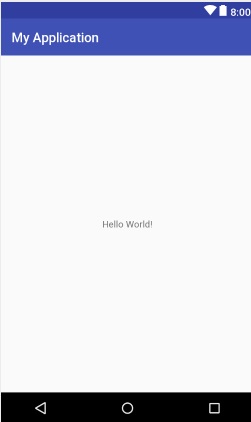
Output
After building the above project, just run it on emulator or any real device. You will see the following result.
Conclusion
So this article, was just to introduce you to the structure of a kotlin application. Any doubt? feel free to write it down. From the next article, we will know the actual magic of kotlin programming language and kotlin extension for android. You will be amazed of what kotlin can do - shorter code, type-safe and much more. Just stay connected. Good day.
Advertisement
Advertisement