Home »
Linux
Compression techniques in Linux
By IncludeHelp Last updated : October 20, 2024
Why Zip and Compression Technique are Required?
In earlier times, when we used to have 5 MB of storage (and not mention bulky in size unlike today's' flash drive or SD cards) and 256 MB of RAM, then people came up with an idea of shrinking data and filesystems and storing them in a more compact form. Though even today archiving, ZIP and compressing techniques used for the ease of data transfer over any network.
Our lovable Linux comes pre-loaded these features all three ZIP, compression and archiving features, you don't need 7-zip or RAR on Linux as you do need on your Window machine (poor souls :P). In our journey to explore Linux, we will get acquainted with compression on our Linux.
Before we get to start with terminal commands for compression let get a theory lesson first:
What is Compressing a File?
It is simply reducing the size of the file by removing redundant information from it, and what archiving is? It is nothing but combining multiple files by which an overhead in each separate file get remove and makes it easier to transmit.
Even today disks space are relatively cheap, archiving and compression still has value:
- If you want to make a large number of files available, such as the source code to an application or a collection of documents, it is easier for people to download a compressed archive than it is to download individual files.
- Log files have a habit of filling disks so it is helpful to split them by date and compress older versions.
- When you back up directories, it is easier to keep them all in one archive than it is to version each file.
- Some streaming devices such as tapes perform better if you're sending a stream of data rather than individual files.
- It is proven faster to compress a file before you send it to over a slower network and decompress it on the other end than it would be to send it uncompressed.
Compressing Files in Linux
Now let's dive in details of compressing files:
As already told you guys, compression is nothing but removing duplicate data from a file to make it shrink in size in such a way that it can be restored back later. For example, in a text file common repeating words can be replaced with something smaller, or in an image where a solid background might is a patch of code instead of long colour codes. We all know that we can't use a compressed file so we need to decompress it before using it.
Algorithms for Compressing File in Linux
We have two broadly categorized algorithms for Compressing file, those are:
1. Lossy
These algorithms removes information from the file that uncompressing that file will result in some lost data. Usually, we prefer Lossy compression for media files like images, videos or audios format.
Why would we prefer to remove some of the data while uncompressing data? Since we use this technique with media files only as human eyes and ears don't catch minute details on a screen or speakers and thus difference can't distinguish between original or the changed version.
2. Lossless
This algorithm makes sure that no data will be lost on uncompressing the file. We prefer lossless compression when data is important, like in text files or messages.
Compression in Linux
For compression, we will use the gzip utility.
We start with compressing a file; it can be achieved with this simple command:
gzip filename
Let's see the snap below the entire file on which we will perform compression and de-compression on these files throughout the article.
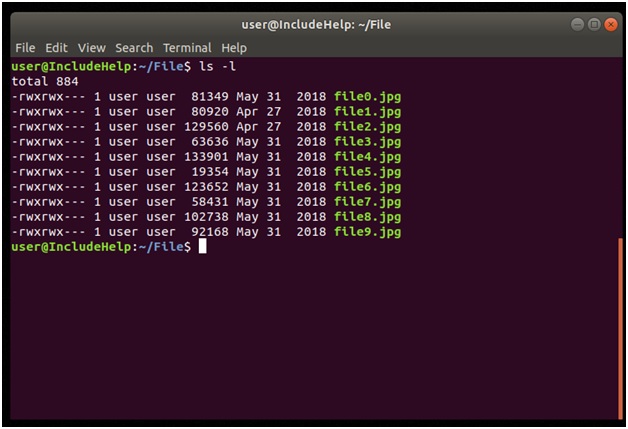
Let's perform the compression:

Explanation
We simply used gzip with our file2 (remember to mention its extension).
Notice its initial size was 1291560 bytes after compressing it with gzip we have file2 with an extension .jpg.gz - where, gz is for gzip and .jpg its own, also after compression we size of file2.jpg is 129100 bytes.
In the later part of the snapshot, we used gunzip which is used for decompressing all the files.
See it's that simple, and we can also perform these operations on multiple files at once:
gzip filename1 filename2 filename3
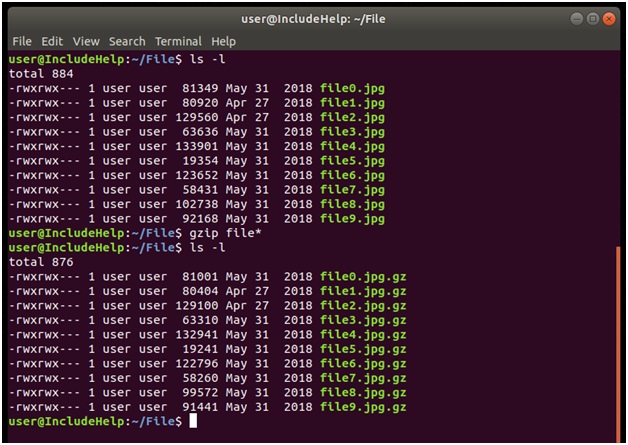
Explanation
In the above snap, we compressed multiple files at once. We used gzip file* which is equivalent gzip file0.jpg file1.jpg... file9.jpg.
Once files are compressed, we can check all the status regarding their compression with "–l" option:
gzip –l filename1 filename2 ...
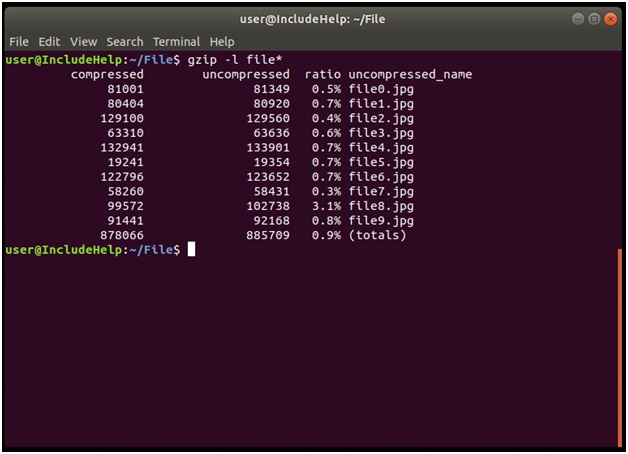
Explanation
After compressing files we used gzip –l operation all files with .gz extension. It will result out all the necessary information viz. compressed size (current size), uncompressed size (old size), compression ratio etc.
Note
1. We can also decompress with gzip by using:
gzip –d filename
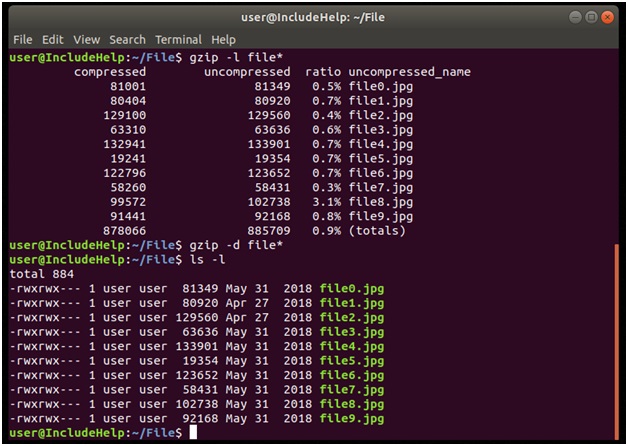
gzip –d will only accept file names with .gz otherwise it will give an error.
2. gzip/gunzip v. bzip2/bunzip2
Just like gzip we have bzip2, both have similar options and operations but the difference is in the compression algorithm used by both.
gzip uses Lempel-Ziv encoding whereas bzip2 uses Burrows-Wheeler Block sorting.
bzip2 compression ratio is higher than gzip that mean, files are smaller when compressed with bzip2 than that of gzip but bzip2 costs more CPU time.
Extension bz or bz2 is for the bzip2 support unlike gzip with .gz
Recommended Articles
Advertisement
Advertisement