Home »
Linux
How to install OpenGL in Ubuntu | Linux
By IncludeHelp Last updated : October 20, 2024
Introduction to OpenGL
Probably most of you have played tons of video games on the computer and probably loved them too, ever wonder how they can be made? Well, there is a lot of Graphics library which provides APIs for the same and in this Article, we will talk about a similar library OpenGL which is an abbreviation for Open Graphics Library, it is a cross-language, cross-platform API which is used for things like 2D and 3D vector Graphics. Its API generally used to interact with a Graphics processing unit that results in hardware-accelerated rendering.
Problem with OpenGL is creating OpenGL context is a little tough thing because the process varies between operating systems, but creating an automatic OpenGL context has become a very common feature in several game-development and user-interface libraries. There is a library which is only meant to produce an OpenGL-capable window and that is OpenGL Utility Toolkit (GLUT) though it was discontinued around 1998-99 this project is superseded by freeglut. And we will talk about freeglut in our OpenGL programs.
OpenGL Installation Guide in Ubuntu
Step 1
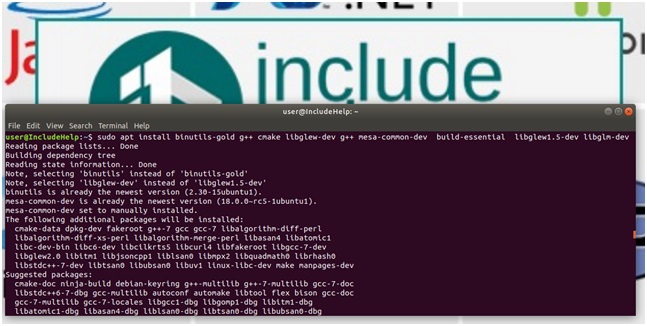
To create OpenGL development environment we need to get some necessary libraries including freeglut so, Open Terminal and enter the following commands:
sudo apt update
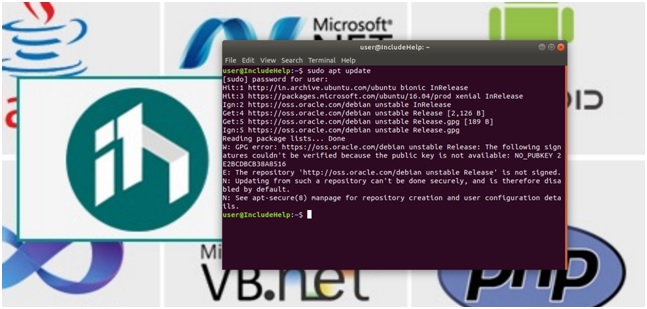
sudo apt install freeglut3-dev

sudo apt install binutils-gold g++ cmakelibglew-dev g++ mesa-common-dev build-essential libglew1.5-dev libglm-dev
sudo apt install mesa-utils
Step 2
If the step 1 successfully done then you can run the OpenGL programs. Download the following OpenGL program.
Copy it from here:
#include <GL/freeglut.h>
#include <stdlib.h>

int x, y;
float r,g,b;

void idle()
{
	x = rand()%640;
	y = rand()%480;

	r=(float)((rand() % 9))/8;
	g=(float)((rand() % 9))/8;
	b=(float)((rand() % 9))/8;

	glutPostRedisplay();
}

void magic_dots(void)
{
	glMatrixMode(GL_PROJECTION);
	glLoadIdentity();
	gluOrtho2D(0.0, 640.0, 0.0, 480.0);

	glColor3f(r,g,b);

	glBegin(GL_POINTS);
	glVertex2i (x,y);
	glEnd();

	glFlush();
}


int main(int argc,char** argv)
{
	glutInit(&argc,argv);
	glutInitDisplayMode(GLUT_SINGLE);
	glutInitWindowSize(640, 480);
	glutCreateWindow("Randomly generated points");
	glClearColor(0,0,0,0);
	glClear(GL_COLOR_BUFFER_BIT);
	glutDisplayFunc(magic_dots);
	glutIdleFunc(idle);
	glutMainLoop();

	return 0;
}
Download the program
Note: The above program is not explained here, in this article, as it is out of the scope of this article.
Step 3
Open terminal in the directory where you have that program and enter the following commands:
g++ Random_Point.cpp -lGL -GLU -glut -lGLEW -o RP

./RP
This is the step we simply compiler the programs also we link the OpenGL libraries with it.
Step 4
After step 3, your program will run and you can see an OpenGL graphics’ random points generation.
You can find something following:

Advertisement
Advertisement