Home »
AutoCAD
AutoCAD 2022 – Setup AutoCAD 3D
Learn how to setup AutoCAD 3D in AutoCAD 2022?
By Akash Periyasamy Last updated : April 01, 2023
What is AutoCAD 3D?
AutoCAD 3D is used to provide facilities for the user to construct 3D objects. There are many added commands that are used to provide thickness to the component. The procedure to change the design workspace from 2D to 3D is explained below:
Steps for setting up AutoCAD 3D
Step – 1: Open Autodesk AutoCAD 2022 software by clicking on the AutoCAD 2022 icon.
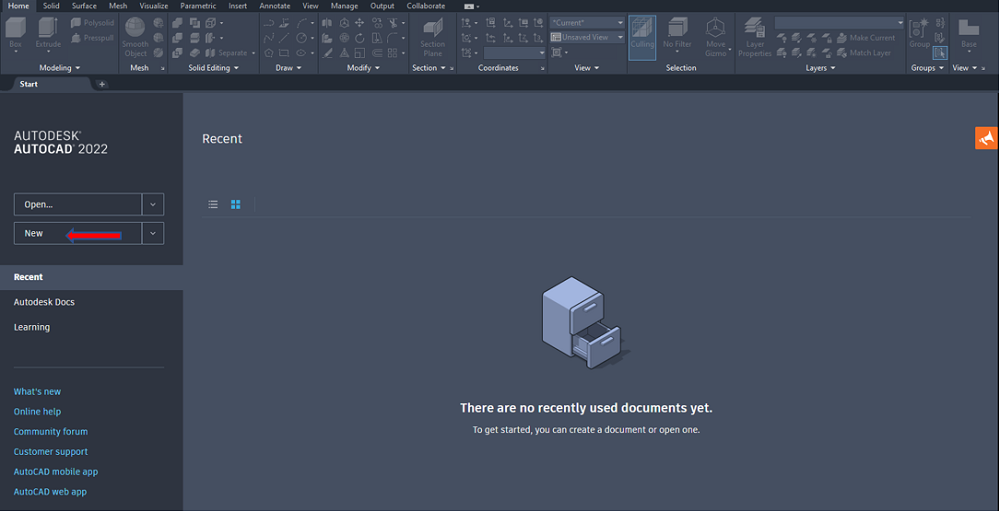
Step – 2: The software will open and end up in a page like the one shown below. Towards the left-hand side, you can find to options "Open" and "New". Click Open if you already have a 3D design. Or else, navigate to New. Just click on the New icon and the software will open the modelling space.
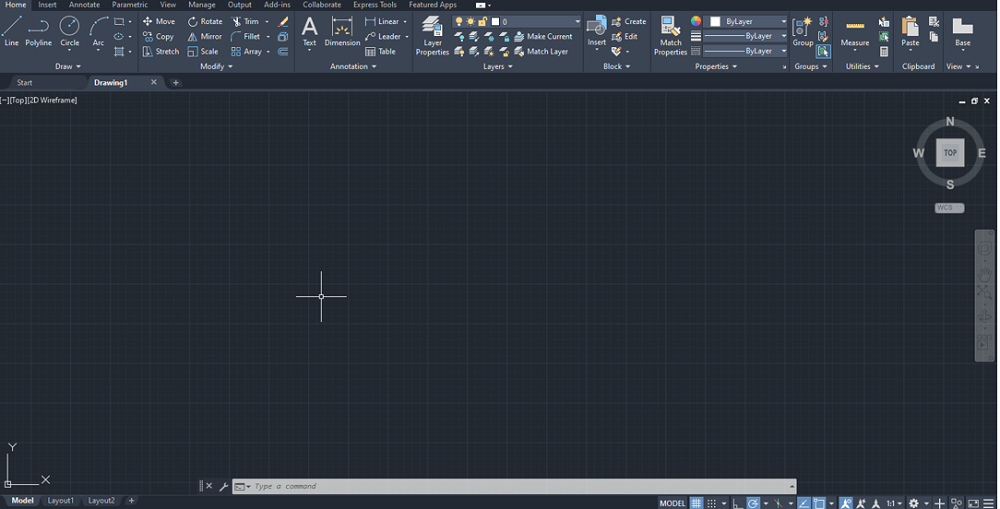
Step – 3: By default, all AutoCAD versions will display 2D modelling space. This space could be used to design and draft 2D components. Various commands like Line, circle, fillet, etc., are provided which are necessary for drafting the required profile.
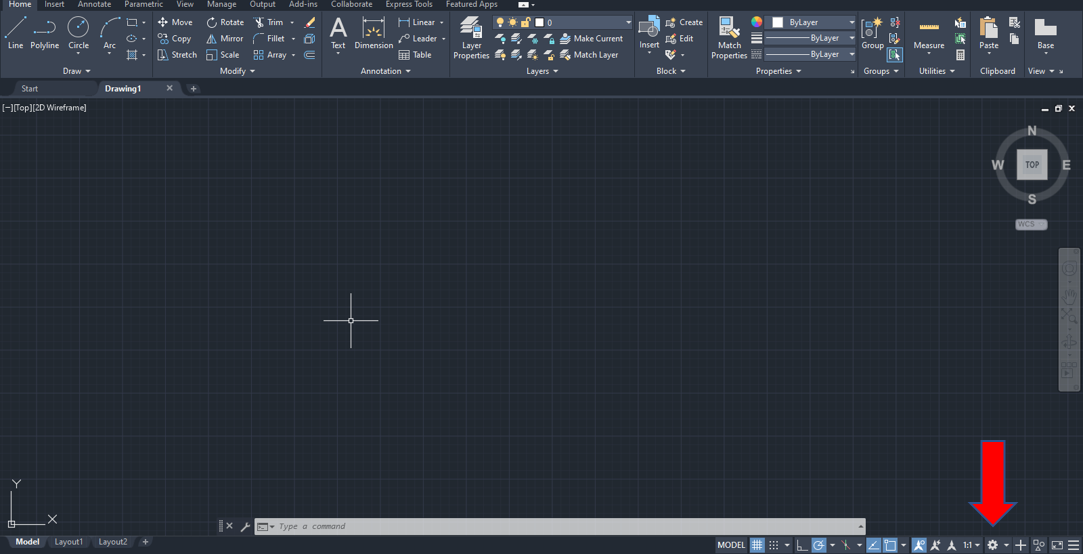
Step – 4: To open the 3D modelling workspace, move towards the bottom of the 2D modelling space. There you can find several options like snap, grid, scale, settings, etc. Among the options, you can find a symbol like this  . It is used to denote settings. Click on the settings icon to proceed further.
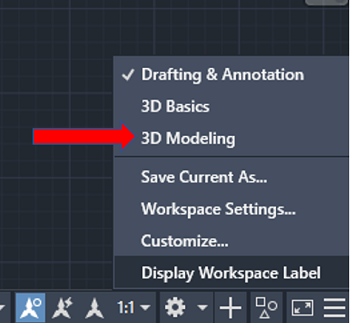
Step – 5: As you click the settings icon, a drop-down list will appear providing various options within the settings icon. You can find that Drafting & Annotation has been selected with a tick mark. Also, there is an option as 3D Modelling in that list. Click on the 3D Modelling option.
Step – 6: Now the 3D modelling space will be opened, and you can perform various functions to design a 3D object.
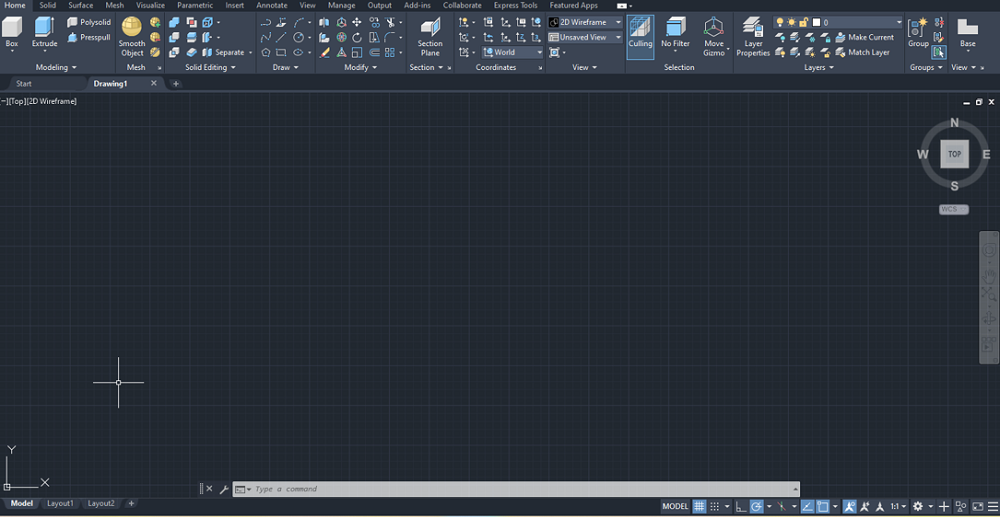
Step – 7: A task bar is present at the top containing various drafting and view options for the ease of the designer to observe the drawing with a clearer perspective.

Step – 8: In the view section under the HOME tab, you will be able to change the view in the design space. Click on the first option named "2D Wireframe".

Step – 9: As you click on it, a drop-down list will be opened. You can find several view options available in the AutoCAD 2022 3D design space. Each view has its own unique features.
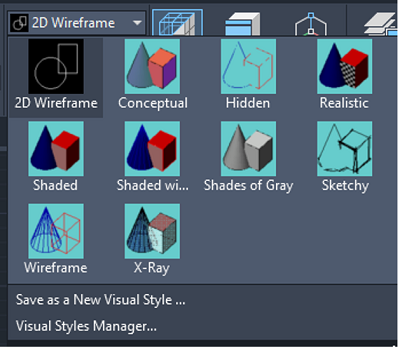
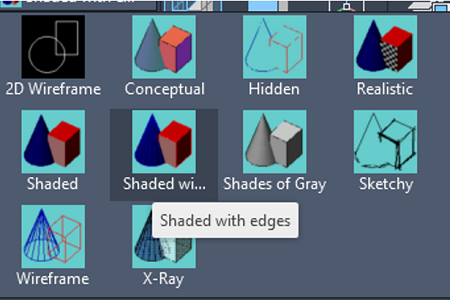
Step - 10: From the list, click on the Shaded with edges option. This is one of the most used view options in AutoCAD 2022. It provided a 3D view with all the edges of the component highlighted.
The required 3D workspace along with the necessary view option is selected. Now, you may enjoy the working environment as you design your dream component.
Advertisement
Advertisement