Home »
JavaScript Examples
Web Application: A To-do List using JavaScript
Here, we are going to create a Web Application to manage a To-Do List using HTML and JavaScript.
Submitted by Himanshu Bhatt, on September 21, 2018
This article mostly covers the aspect of JavaScript in this web application. We used HTML, CSS (optional) and JavaScript.
A To-do List using JavaScript and HTML
Our basic idea for this Web application is to create and delete our task/job as per our choice. We will use HTML to structure it and CSS (again it is totally optional), and javascript to provide functionality like adding or removing tasks from the list. We created 3 files: index.html, style.css, todo.js
index.html
Let's start with index.html:
<html lang="en">
<head>
    <meta charset="UTF-8">
    <meta name="viewport" content="width=device-width, initial-scale=1.0">
    <meta http-equiv="X-UA-Compatible" content="ie=edge">
    <link rel="stylesheet" href="style.css">
    <title>IncludeHelp is Awesome</title>
</head>
<body>
    <div id="container">
        <div class="controls">
            <h1>My Awesome To-do</h1>
            <input type="text" name="" id="input"><br>
            <button type="button" id="add">Add Task</button>
            <button type="button" id="remove">Remove Task</button>
        </div>
        <ul id="list">
            <li class="mycheck"><input type="checkbox" id="check"><label >
				Go to Gym</label></li>
            <li class="mycheck"><input type="checkbox" id="check"><label >
				Read Articles on IncludeHelp</label></li>
            <li class="mycheck"><input type="checkbox" id="check"><label >
				Learn JavaScript</label></li>
        </ul>
    </div>
    <script src="todo.js"></script>
</body>
</html>
Explanation:
We created this HTML document, with the title "IncludeHelp is Awesome" which will be shown on our tab. Now come to the body of the HTML, we created a container (id) division which has two children another division which holds the input textBox, add and remove buttons andofcourse, our applications Name "My Awesome Todo" and second child of the container is <ul> that is unordered List. Inside unordered list, we predefined three Tasks as "Go to Gym", "Read a Articles on IncludeHelp" and "Learn JavaScript".
In each list under unordered list, we have an input type checkbox and a label. And in the last line, we linked our JavaScript file with HTML document.
Now let's see CSS part, [again guys... this is totally optional and we can do without it too]:
style.css
What we did in this Style Sheet that is we set attributes for hover and focus on buttons and strike-though the label text open checking them and rest you can see.
body{
    background-color: #34495e
}
#container {
    width: 350px;
    height: auto;
    margin: 0 auto;
    text-align: center;
    background: white;
    height: 800px;
    overflow: auto;
    color: black;
    border: 10px solid #01a3a4;
    border-radius: 10px;
}
#container h1 {
    margin-top: 50px;
    margin-bottom: 50px;
    text-transform: uppercase;

}
#container ul{
    margin-top: 50px;
    padding-left: 0;
}
#container ul li{
    list-style: none;
    border: 2px solid #b5c5dd;
    width: 80%;
    opacity: 0;
    transition: opacity 0.5s ease-in-out;
    height: 40px;
    margin: 5px auto;
    text-align: left;
}
#container ul li label{
    margin: 0 auto;
    vertical-align: middle;
    height: 100%;
    line-height: 40px;
    font-size: 18px;

}

#container ul li #check{
    float: left;
    width: 30px;
    height: 30px;
    margin: 5px;
    -webkit-appearance: none;
    border: 2px solid #b5c5dd;
    position: relative;
    outline: 0;
}

#container ul li #check:checked::after {
    content: '\2714';
    font-size: 20px;
    position: absolute;
    top: 0px;
    left: 7px;
    color: black;
}

#container ul li input[type='checkbox']:checked+label{
    text-decoration: line-through;
    color: rgba(0, 0, 0, 0.3);
}
#container .controls {
    width: 60%;
    margin: auto;
}

#container .controls #input{
    width: 100%;
    height: 30px;
    font-size: 20px;
    padding-left: 5px;
    box-sizing: border-box;
    margin-bottom: 20px;
    border: 2px solid #b5c5dd;
    border-radius: 10px;
}
#container .controls #input:focus {
    outline: 0;

}

#container .controls button{
    width: 100%;
    background: white;
    border: none;
    height: 30px;
    margin-top: 2px;
    cursor: pointer;
    color: white;

}
#container .controls button:focus{
    outline: 0;
}

#container .controls button:hover{
    transform: scale(1.05);
}
#container .controls #add{
    background-color: #2980b9;
    border-radius: 10px;
}
#container .controls #remove {
    background-color: #c0392b;
    border-radius: 10px;

}
#container .mycheck {
    opacity: 1;
    border-radius: 10px;
}
.visual {
    opacity: 1 !important;
    border-radius: 10px;
}
Now we will cover the JavaScript part.
todo.js
var ul = document.getElementById('list')    //line 1
var li;
var addButton = document.getElementById('add')  //line 2
addButton.addEventListener("click",addItem)

function addItem(){                         //line 3
    var input = document.getElementById('input')        //line 4
    var item = input.value;             //line 5
    var textNode = document.createTextNode(item)    //line 6
    if (item == '') {       //line 7
        msg= "Enter your Task"
        alert(msg)
        return false

    } else {                //line 8
        li = document.createElement('li')       //line 9
        let checkbox = document.createElement('input')         //line 10
        checkbox.type = 'checkbox'              //line 11
        checkbox.setAttribute('id','check')         //line 12

        let label = document.createElement('label')         //line 13

        ul.appendChild(label)                       //line 14
        li.appendChild(checkbox)
        label.appendChild(textNode)
        li.appendChild(label)
        ul.insertBefore(li, ul.childNodes[0])
        setTimeout(()=>{
            li.className = 'visual'
        },5)
        input.value = " "               //line 15
    }
}

var removeButton = document.getElementById('remove')        //line 16
removeButton.addEventListener("click",removeItem)       //line 17

function removeItem(){              //line 18
    li=ul.children
    for (let index = 0; index < li.length; index++) {   //line 19
        const element = li[index];              //line 20
        while(li[index] && li[index].children[0].checked){      //line 21
            ul.removeChild(li[index])
        }

    }
}
Explanation:
In line 1, 2 and 16 we just simply created two objects for our unordered list, add button and remove the button by getElementById() method. After line 2 we linked addButton with an eventListener.
In line 3, we created an addItem function which we used with the Event listener earlier. Where we created an object for input and stored whatever value inside it in another variable name item, also we stored the text content of the item into textNode using createTextNode() method.
In line 7, we simply checked if the value of the input (textbox) is empty, if it will be empty it will pop an alert saying "enter your Task" otherwise it will run the else part where it will add a new task in the list.
From line 8 to 13 we created elements like li (list), label, checkbox input, in line 11 we used the setAttribute method to set the input as a checkbox. So far our new element is created but it is not been added to the list so far, in line 14 onwards we append child in ul, li,and label.
Since, we wanted to add a new task on the top of the existing list, we used insertBefore() method. If you have skipped the CSS part then you don't need the setTimeout() function, but if you added it then we used setTimeout() function slow transition which will turn the opacity of the new list to 1 (visible). In line 18, we created a removeItem function which was called in the linked eventListener of removeButton. What we did inside this function is we simply stored the children of ul (unordered list) into li which is in the form of an array. In that array we access it with for loop for each index and then we used nest loop to check the insideof the element of array whether it is checked or not also we checked whether the index is valid or not with li[index], it satisfies the above condition it simply remove it.
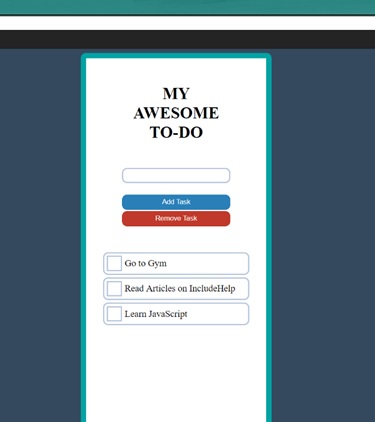
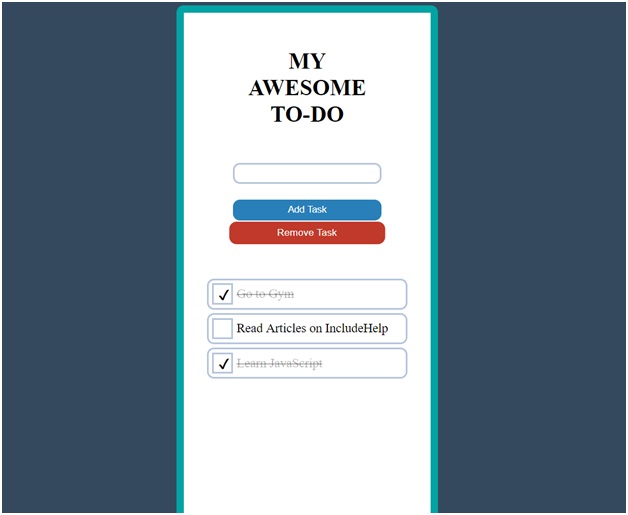
Screenshots (Output)
We have done a marvelous job here, which look like this:
Download To-do App (Zip file)
JavaScript Examples »
Advertisement
Advertisement